Building a background swapper app with NextJS - Part I
I like to focus my coding to creation, rather than maintenance. Let's build our own dashboard GUI in NextJS. Part I - Front-end

While I'm an avid user of command line tools and enjoy coding my solutions, where possible, I've recently warmed up to graphical user interfaces. I guess I'd like to focus my coding to creation, rather than maintenance. This naturally led me to wanting to build my own GUIs for common tasks. But how quickly and simply could I do it?
Let's narrow the idea down to an application that could remove the background from my selfies and photos? Say I made a photo of myself at home and wanted to replace the my kitchen with a more interesting backdrop? The tools are all out there to do it with nothing, but a bit of coding. Let's think through the process.
What would a simple dashboard site would need. It's a common enough project, with millions of examples. Be it your email client, your profile page on a website or just your orders on a webshop? All dashboards in some form.
My ingredients for the dashboard recipe are:
- A database to hold data
- A front-end interface to show/edit/create data
- Authentication logic to lock data behind a login
- (Optionally) An object storage service to store files remotely
This is just the part that can be created in a vacuum on your own machine. To get this our to the world requires a few extra ingredients. These I'll skip in detail for now, but to give you an idea:
- A domain, via which you can visit your app
- A server or service to host your app
- Depending on the way you host a web server to manage the incoming traffic
Instead of diving into the big picture further, I'd want to build something simple like this:
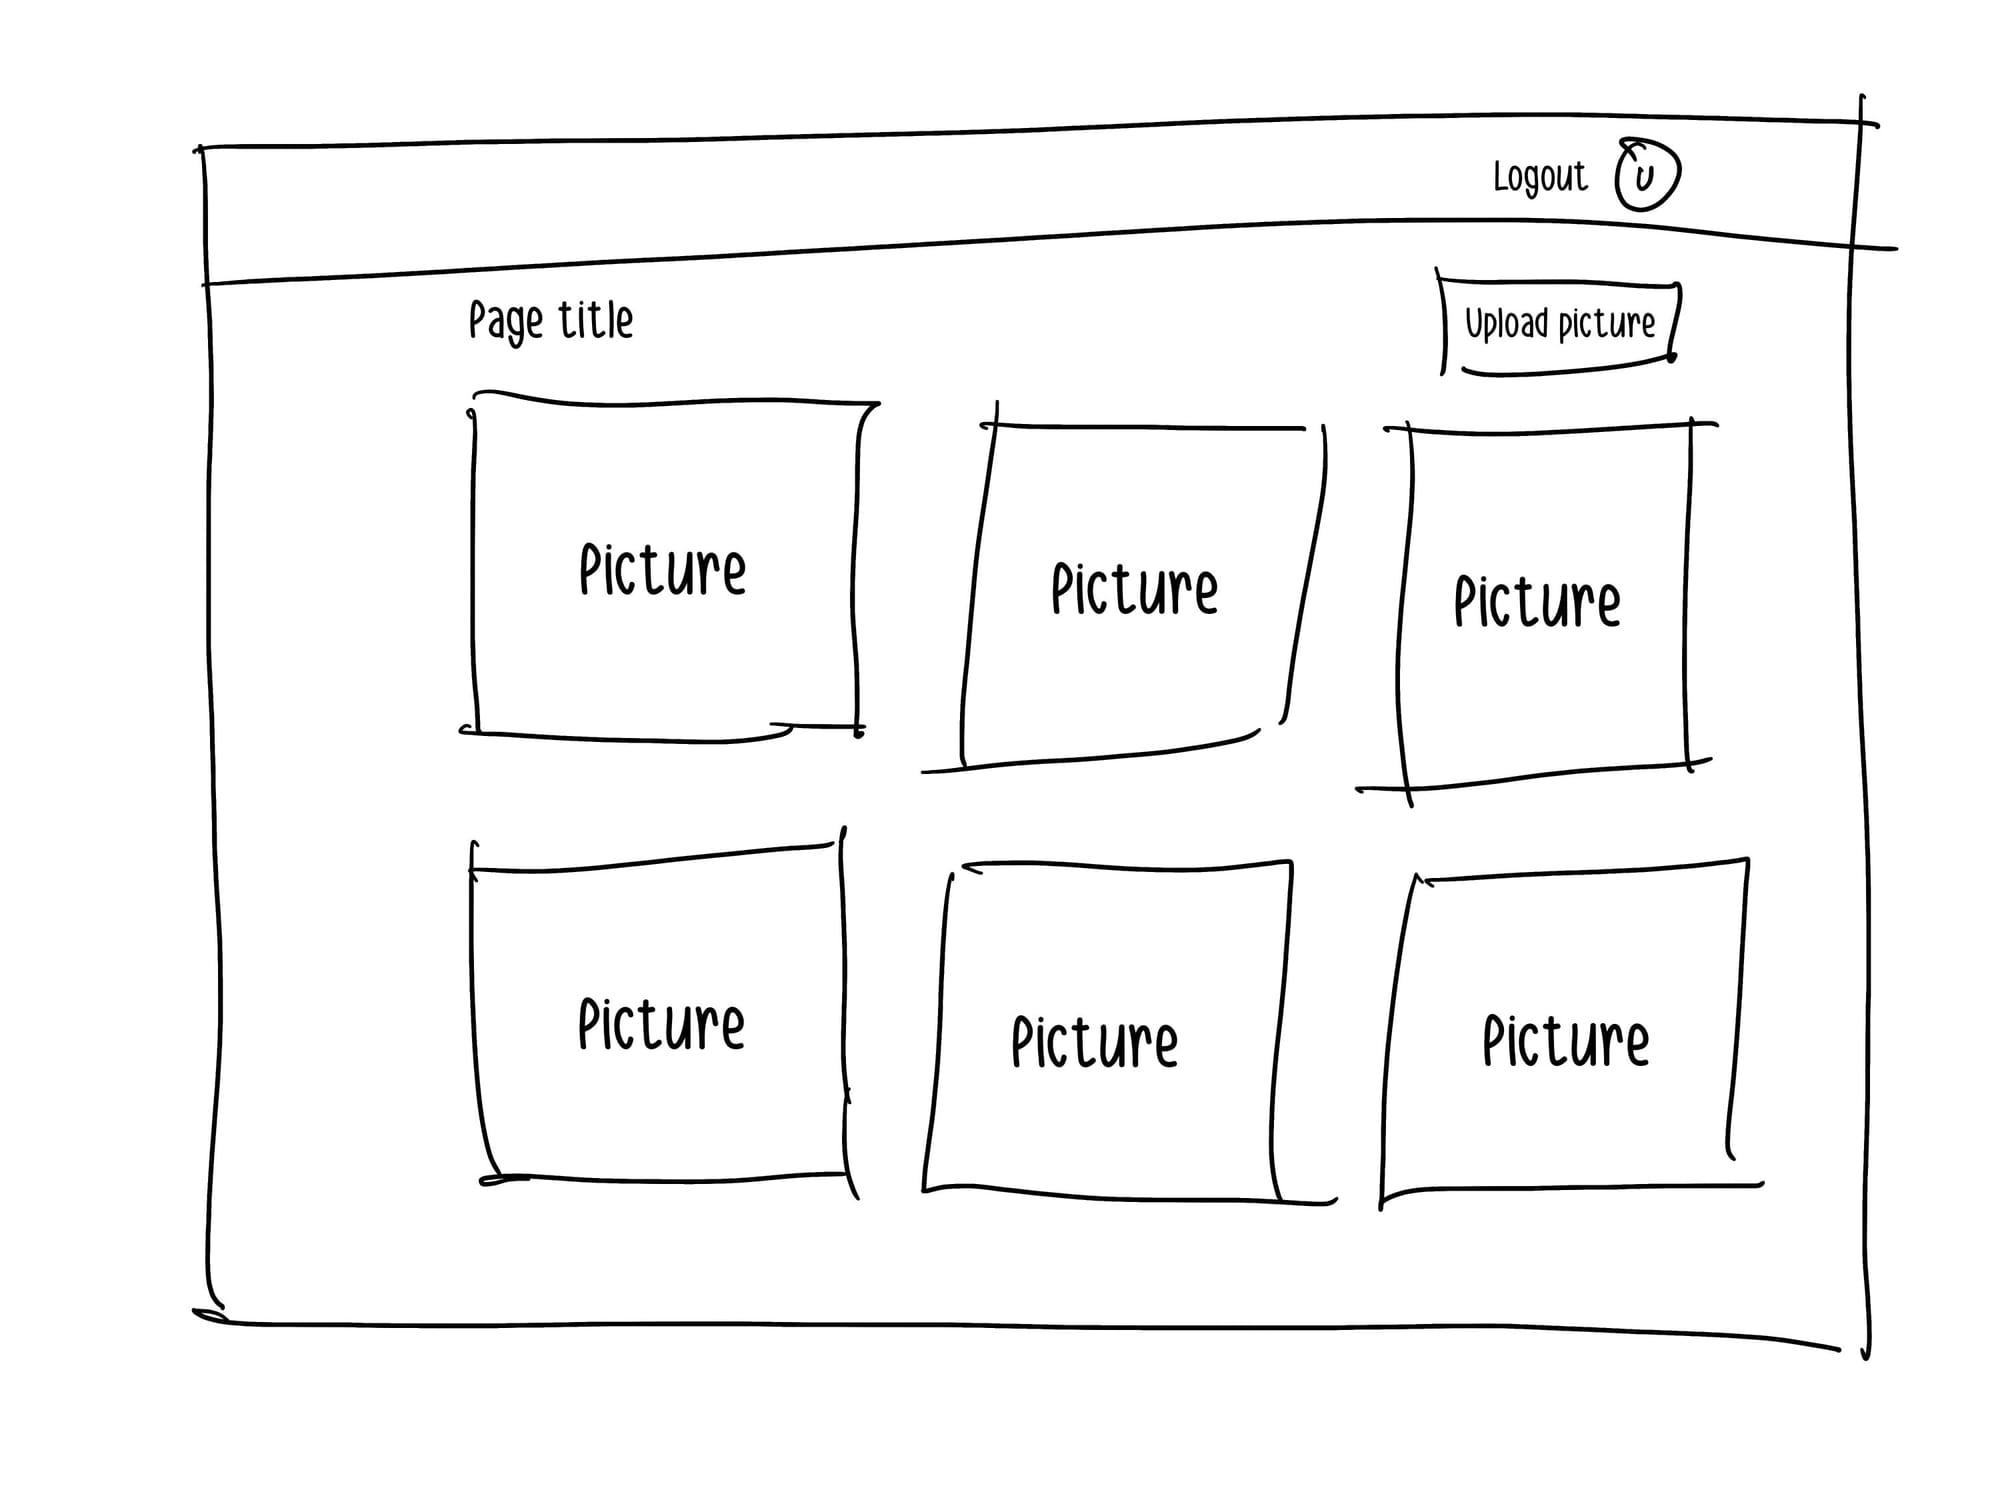
I'm not a talented artist, but I think you can see some similarities between the wireframe and other sites you're using. It's essentially a page showing the uploaded photos in your gallery plus a button to upload another photo.
I don't want to reinvent the wheel and would rather use out of the box solutions. Trying to host your own database or writing your own library for a common task is definately interesting and rewarding, but perhaps distracting when you have a specific goal in mind. This means that aside from NextJS, I'll use Prisma as an ORM to talk to my database.
We'll need external I'll use Neon to quick get a Postgresql database in the cloud for my data. I'll keep my uploaded files on Cloudflare R2, instead of storing them on my own machine. I want to be able to access my edited photos from anywhere! I want to secure all of this too. For this, I'll use Auth0, but do it at the end, before making my site public.
Everything starts with creating a project
NextJS is a web framework based on React, which is a good starting point for almost any project where the expected deliverable is a web app or service. I've used it for years with delight, it has made me fall in love with web development again. With components and the ability to run code on the server side, it helped me build all-in-one webapps, with front-end interaction, together with an api & database layer.
While it has its quirks and is certainly not as elegant as Vue-based competitors, like NuxtJS. However, for me, the amount of support & examples you can find to help with your work outweighs the downsides.
I've decided to call my new project Swappington, since we want it to swap picture backgrounds. Having developed a separate obsession with owning a simple domain name for even mundane hobby projects, I quickly picked up swappington.com.
What's an idea without code, though? I want to start by creating a new project for Swappington. Checking out Nextjs's docs, this is simple enough. I'll be pasting shell commands here assuming you know the basics of using the terminal.
npx create-next-app@latest
Note: if this command fails, install NodeJS first, ideally the LTS version, we'll need it: https://nodejs.org/en. At the time of writing, the LTS version is NodeJS 20.16.0, but anything starting with 20 will do.
NextJS gives us a few questions to answer to set up the project. These range from extremely helpful () through unimportant (Would you like to use src/ directory?) to options which make your life objectively harder (Would you like to use App Router? (recommended)).
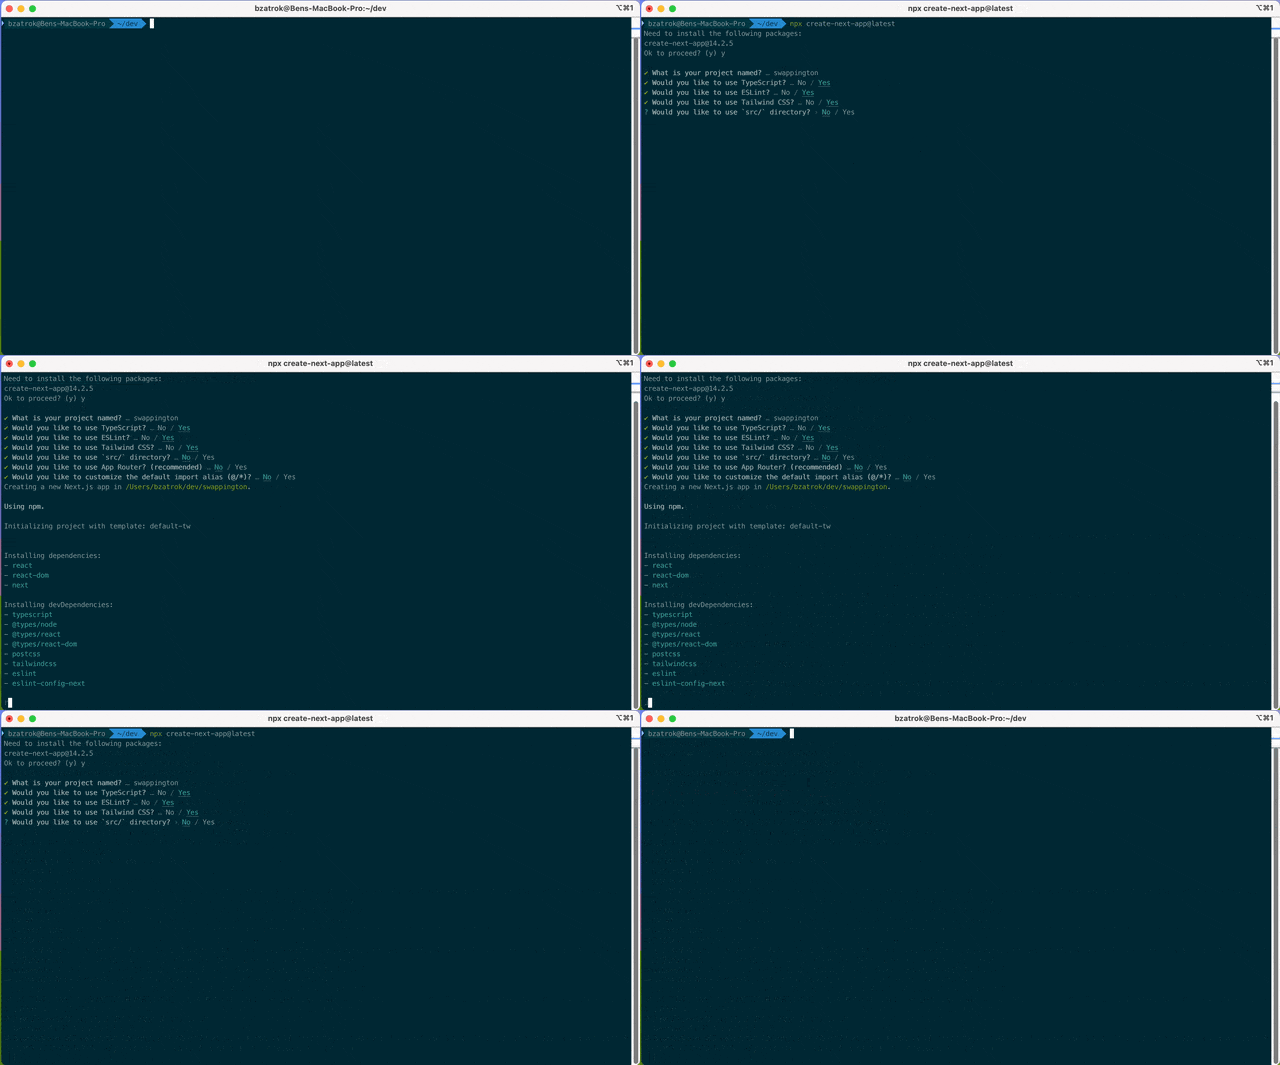
I recommend using Typescript and Tailwind, while not using App Router. Why? Typescript makes life a bit harder by enforcing data types, but gives you guardrails & security in knowing that data your functions actually need. Tailwind is a breath of fresh air when it comes to styling your front-ends. I'll never write CSS if I don't have to. App Router on the other hand should be the next step for NextJS, but at the moment it has more quirks and less support as opposed to the previous default, Pages Router. Stick with Pages, since it's the proven one.
After this wizard, you have your app ready, navigate to it:
cd swappington
Running your new project
The wizard didn't tell us what to do next though. When in doubt what you can do with a javascript (or more correctly NodeJS) based project, consult the package.json. This holds project info, dependencies and most important of all: commands.
If you open the swappington folder in a code editor like VS code, check the package.json file:
{
  "name": "swappington",
  "version": "0.1.0",
  "private": true,
  "scripts": {
    "dev": "next dev",
    "build": "next build",
    "start": "next start",
    "lint": "next lint"
  },
  "dependencies": {
    "react": "^18",
    "react-dom": "^18",
    "next": "14.2.5"
  },
  "devDependencies": {
    "typescript": "^5",
    "@types/node": "^20",
    "@types/react": "^18",
    "@types/react-dom": "^18",
    "postcss": "^8",
    "tailwindcss": "^3.4.1",
    "eslint": "^8",
    "eslint-config-next": "14.2.5"
  }
}
What does this tell us? Aside from a list of dependencies (stuff needed for the app to run) and devDependencies (stuff needed to develop the app), there are 4 commands or 'scripts' we can run. The most important for development is 'dev'. You can run these commands with several different command line tools, like npm, yarn, pnpm. They all have their benefits, choosing one is usually a matter of preference unless you're dealing with huge projects and need extra efficiency. I usually use yarn since it caches packages & is faster to install if you manage multiple projects. Check if you have it installed like this:
npm install --global yarn
Now that we've gotten that out of the way, let's run the dev script. With yarn, this can be done like this:
yarn dev
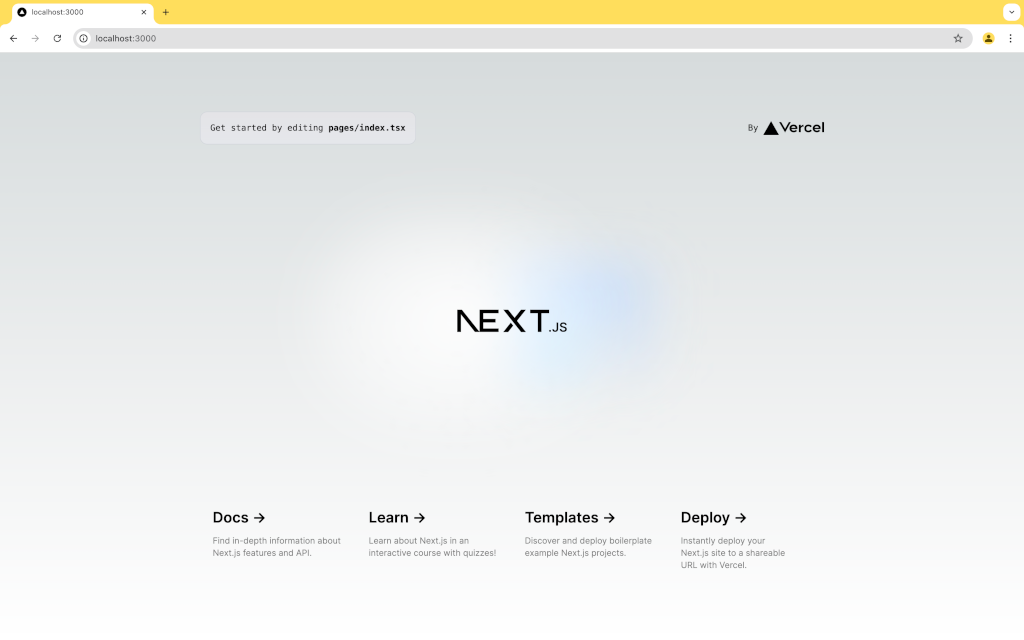
This will run a development server and show you your brand new homepage:
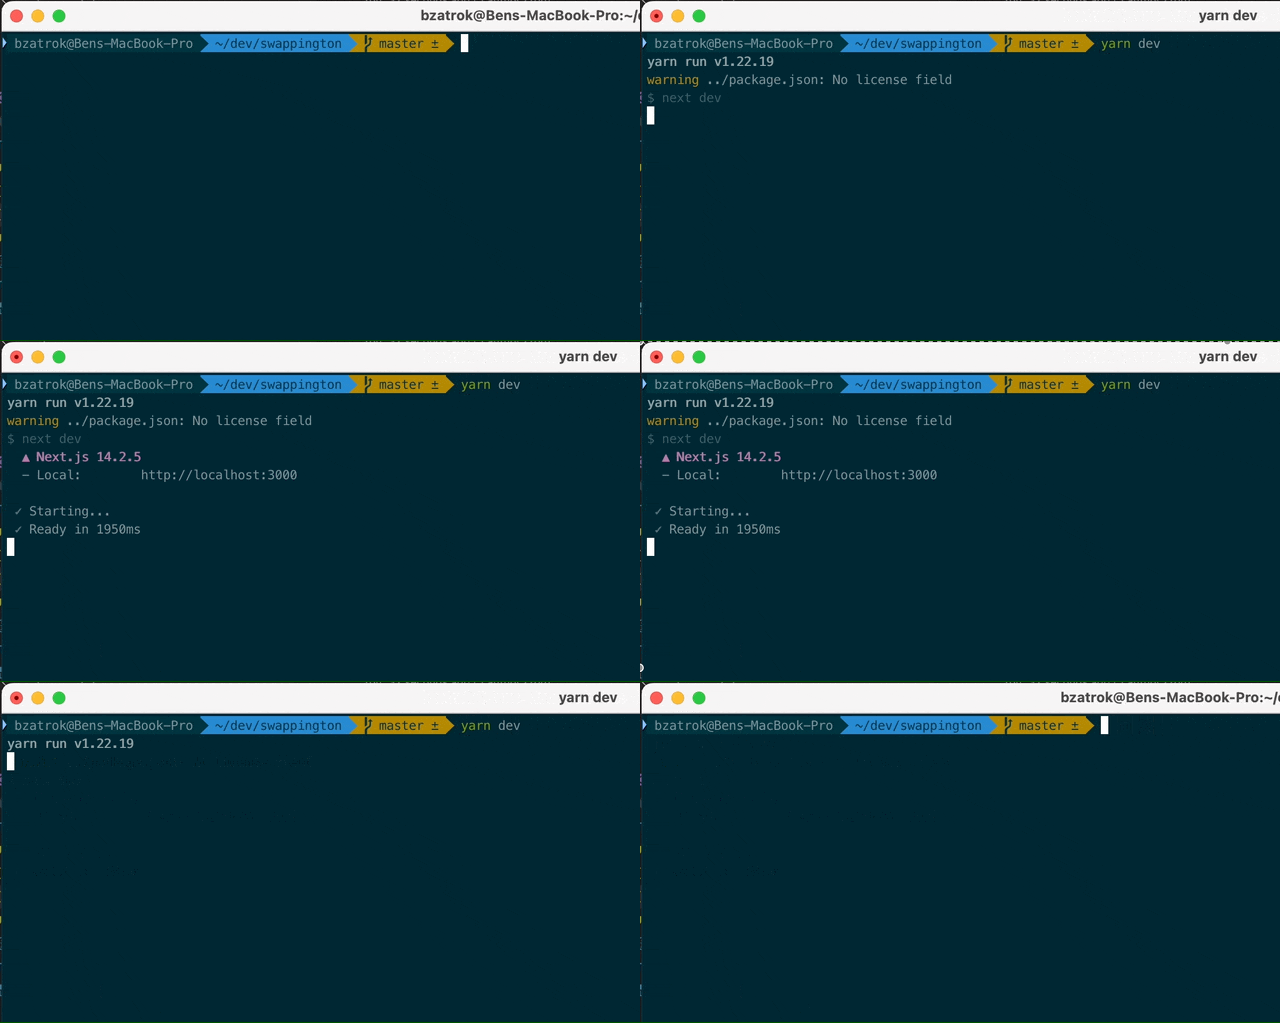
You can visit localhost:3000 in your preferred browser and voila:
Getting started with coding
Looking at the code itself, we have several files & folders. Our most important folder will be pages. This is where files and folders will define our site's pages.
There's a few default files you need in here, such as app.tsx, which is the app's entrypoint and document.tsx, which is the main layout. There's more details in NextJS docs if you'd like to dive in.
We'll build in index.tsx, where a lot of the code you see is the template homepage shown above. Let's get rid of most of this. Thanks to Tailwind we can just specify our styling in the 'className' attributes. If you need a reference for stying, check out their handy reference: https://tailwindcss.com/.
Tailwind will activate it's styling via the styles/globals.css files. To keep only the most barebones of styling, change this file to contain only these lines:
@tailwind base;
@tailwind components;
@tailwind utilities;
This will give us a clean slate to work with. From here, we can strip down the homepage to the bare essentials:
export default function Home() {
  return (
    <main
      className="flex min-h-screen flex-col py-24 px-5 md:px-[20%]"
    >      {/* Top row with title & add picture button */}
      <div className="flex flex-row justify-between">
        <div className="flex flex-col gap-2">
          <h1 className="text-4xl font-bold">Swappington</h1>
          <p>
            Tired of the boring backgrounds on your selfies?
            Upload a picture in here and get a cool new one!
          </p>
        </div>
        <div>
          <button className="bg-blue-500 text-white px-4 py-2 rounded">
            Upload picture
          </button>
        </div>
      </div>
    </main>
  );
}
Arguably, not looking great, we'll make it better. If we want a simple MVP, we'll need to be able to upload pictures & see a list of our previous pictures. This sounds easy, but even doing this involves the intermingling of front-end styling, communication with our (yet to be built) back-end API, storing data in and querying data from a database.
Starting with the front-end
NextJS allows us to break our interface into bits, namely layouts, pages and components. Layouts are shared across several pages and contain elements which are the same on all pages, like navigation bars and footers. They also leave space for page content to appear. Pages, as the name suggests, define a page on the website & the content defined within will fit into a section within the desired layout. Components are repeating UI elements which we can re-use across multiple pages.
Some parts of the design can be componentized. We can build standalone component files for these parts & reuse them, reducing the size of our page & work.
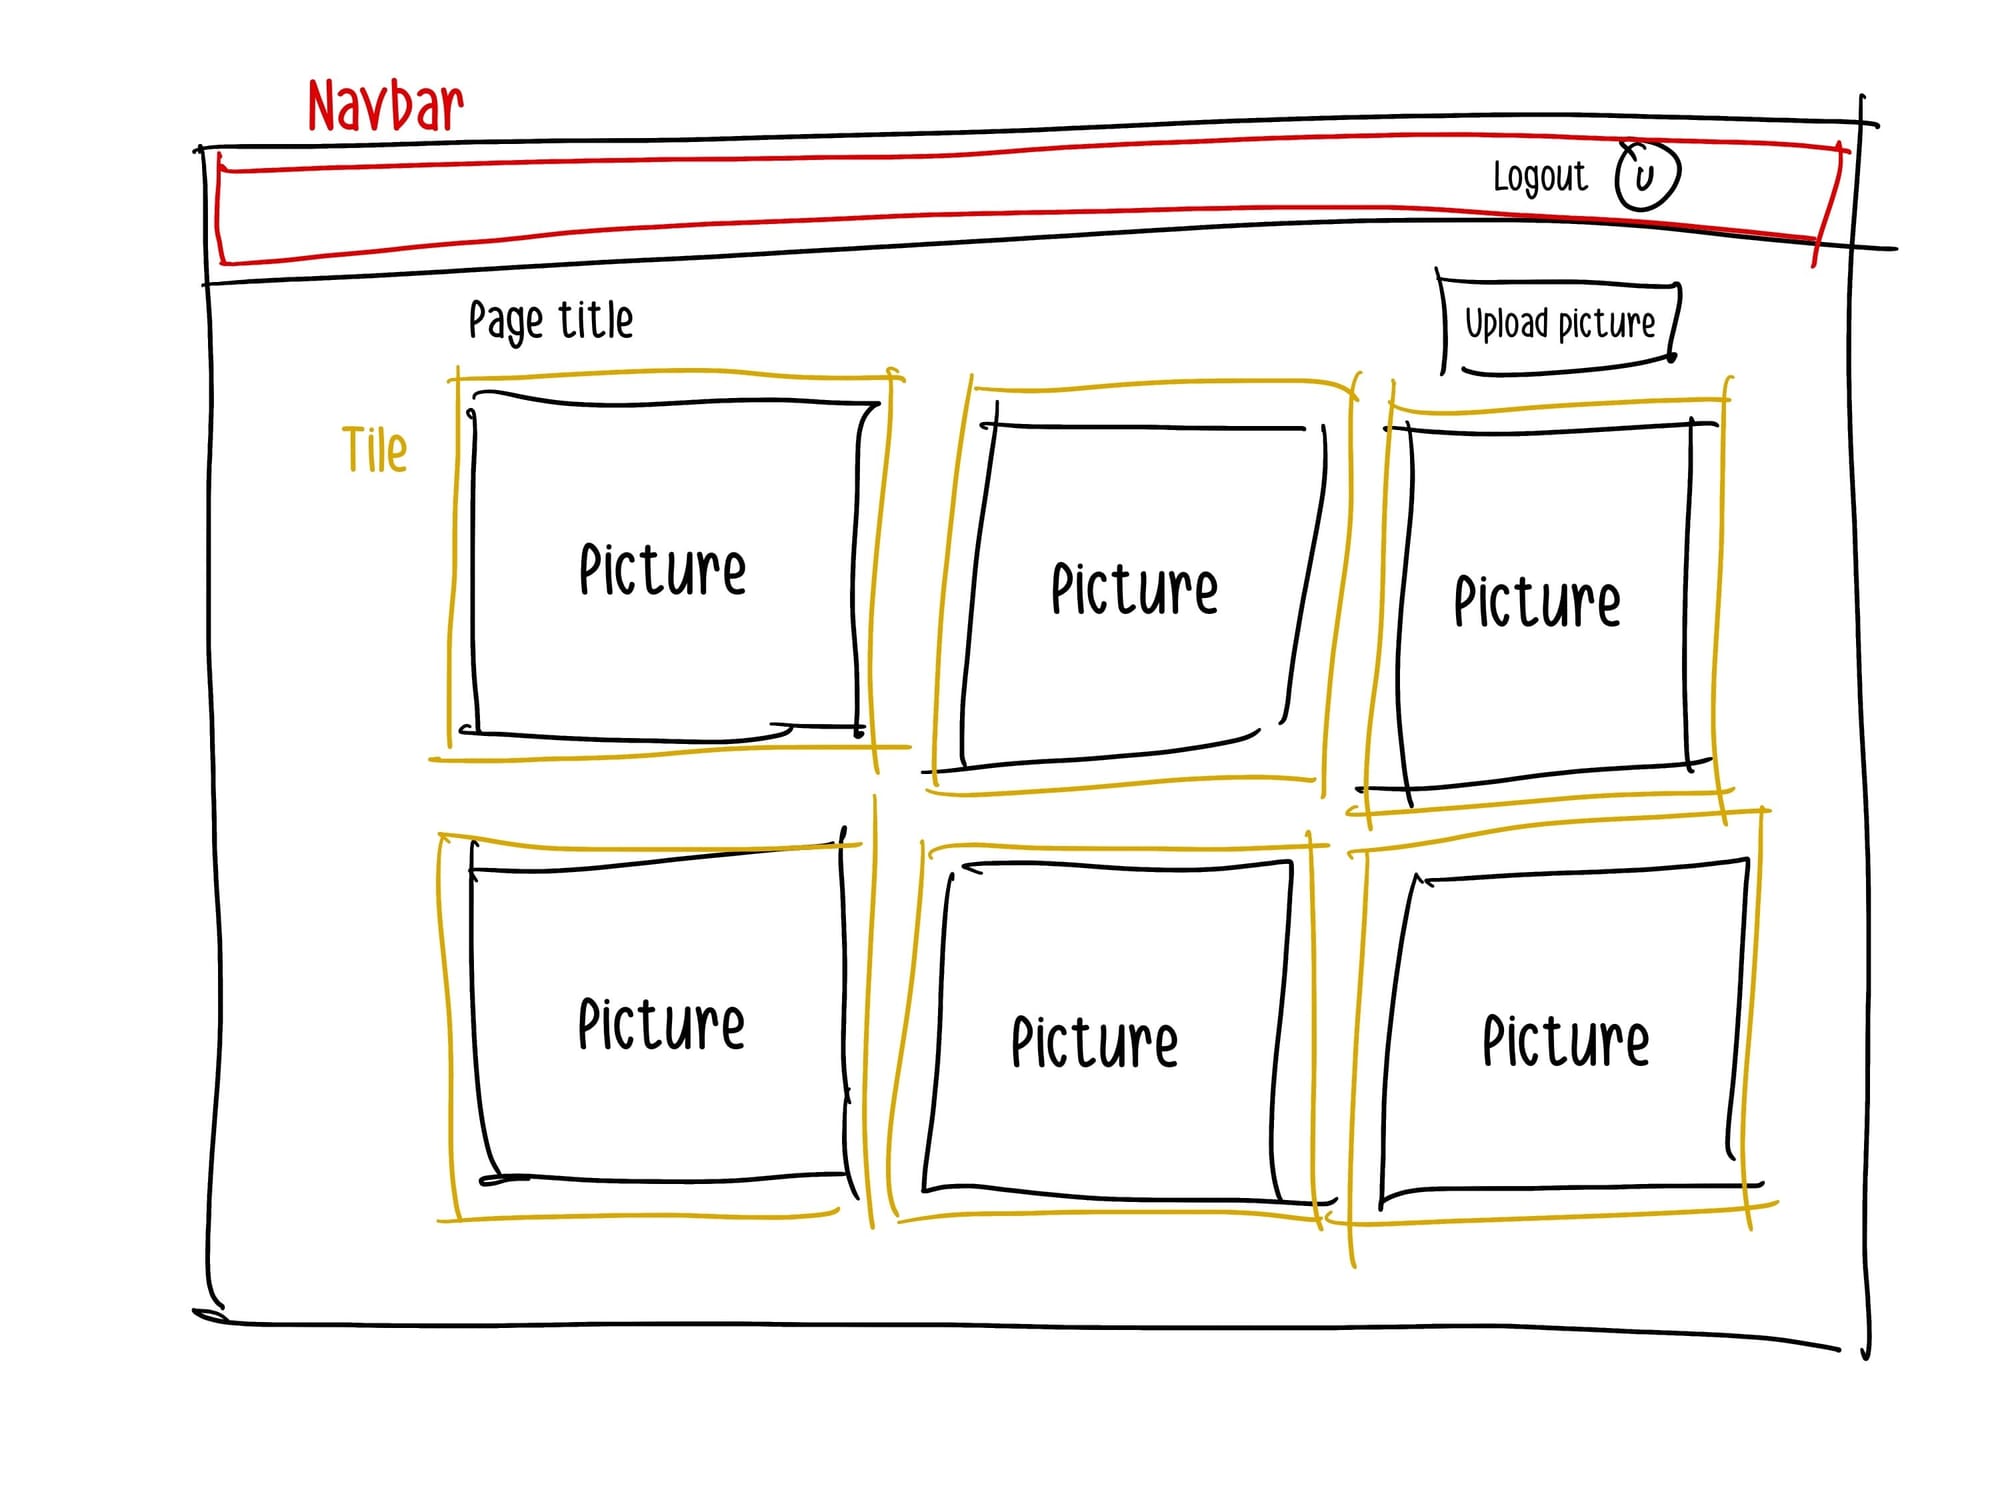
To keep things simple, we'll build the interface like this:
- General layout to show page content in the center and navbar at the top
- A page that shows a title, an upload button and a grid of picture 'Tile' components
- A navbar at the top, displayed via the layout to allow for login/logout later
Building the layout
To use a layout in our pages, we'll need to first create a componenets folder in the root of your projects (on the same level as pages) and create a Layout.tsx file in here. By convention, we'll capitalize the component files, instead of keeping them lower case, like pages. This folder is where we'll create UI components for our site. Layout is also considered a component in NextJS. A layout can be as simple as this:
import { FC, PropsWithChildren } from "react";

const Layout: FC<PropsWithChildren<any>> = function ({ children }) {
    return (
		<main
			className="flex min-h-screen flex-col items-center justify-between p-24"
>
			{children}
		</main>
    )
}

export default Layout;
When working with NextJS pages and components, our .tsx (or .jsx) code is what we're using to generate HTML. It's a React format that allows us to add dynamic content into html templates. Each page or component needs a 'return' statement, where we return the finished html template.
Since we're using typescript, defining a page requires more code than regular javascript, but we also are more explicit about what each function does and expects. Each page is a javascript/typescript function in NextJS that returns React components. We're defining a const, or variable here and giving it a type (FC<PropsWithChildren<any>>). This means that Layout is a functional component (FC) that accepts children, in this case React props (the page that it should display). This layout does nothing more than wraps the contents of the page (children) in a <main> tag.
For now, this will do as a layout. To make our index.tsx page use this layout, we need to wrap our page content in a <Layout> block. This will pass all content in the page through the layout.
import Layout from "@/components/Layout";

const Home = function() {
  return (
    <Layout>
      {/* Top row with title & add picture button */}
      <div className="flex flex-row justify-between">
        <div className="flex flex-col gap-2">
          <h1 className="text-4xl font-bold">Swappington</h1>
          <p>
            Tired of the boring backgrounds on your selfies?
            Upload a picture in here and get a cool new one!
          </p>
        </div>
        <div>
          <button className="bg-blue-500 text-white px-4 py-2 rounded">
            Upload picture
          </button>
        </div>
      </div>
    </Layout>
  );
}

export default Home;
What we've done is extracted the <main> tag that was part of the index.tsx page, and placed it in <Layout>. The page will look exactly the same, but if we wanted to add a second page, we could preserve the overall look and feel of the site & only re-build the core content of the page each time.
Creating a simple navigation bar
We have our layout, let's create a simple navbar to allow us to display navigation buttons, as well as login/logout options.
Create a new component in the componenets folder, named Navbar.tsx. This will be a component we pull in via the Layout.tsx file
const Navbar = function () {
    return (
		<nav
			className="flex w-full h-16 bg-gray-300 items-center justify-between px-5 md:px-[20%]"
>
			<div>
				<span className="text-gray-800 font-bold text-2xl">Swappington</span>
			</div>
			<a href="#">
				<span className="text-gray-800 text-lg border border-gray-800 px-4 py-2 rounded hover:bg-gray-300 transition">Login</span>
			</a>
		</nav>
    )
}

export default Navbar;
This will give our site a nice header we can add functionality later. Since we've added a site title here, we can remove it from our index.tsx page to avoid duplication. Let's also adjust our subtitles:
import Layout from "@/components/Layout";

const Home = function() {
  return (
    <Layout>
      {/* Top row with title & add picture button */}
      <div className="flex flex-row justify-between">
        <div className="flex flex-col">
          <p>
            Tired of the boring backgrounds on your selfies?
          </p>
          <p>
            Upload a picture in here and get a cool new one!
          </p>
        </div>
        <div>
          <button className="bg-blue-600 text-white px-4 py-2 rounded">
            Upload picture
          </button>
        </div>
      </div>
    </Layout>
  );
}

export default Home;
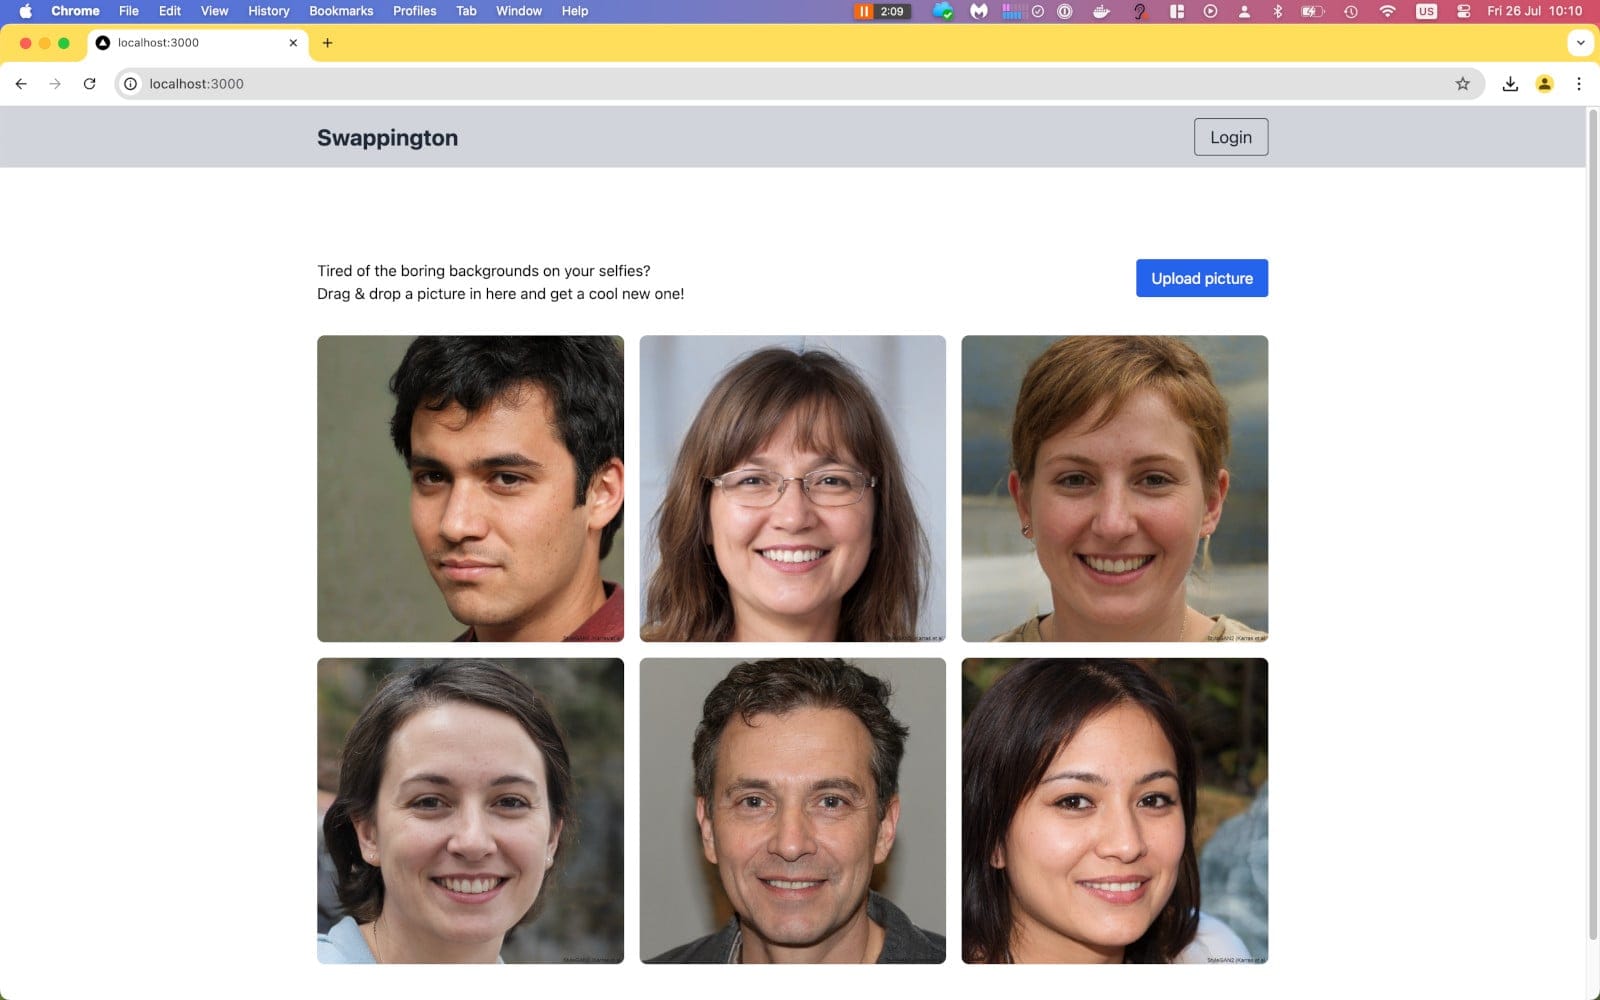
We're only missing a way to show our images. Since all we need is grid, we'll use tailwind's grid class to display a few images. This is a good opportuntity to use a placeholder list of images in our tsx template. We'll use AI generated photos from https://this-person-does-not-exist.com/en.
I've downloaded 6 images from here to serve as placeholders. I named them face1-6.jpeg & moved them into the public folder in the project. This will expose them as static files, so we can just access them via their filenames, e.g.: http://localhost:3000/face1.jpeg.
We'll create a variable to store all 6 images a the top of our homepage. To pull them into the page we'll need to loop through the array & return a front-end element for each picture. In NextJS, you can do this my calling an array's built in .map() function. Map will go through each item in the array and let you return something else. Using the contents of the array, we can turn strings representing the pictures' urls into <img> tags our front-end can display.
import Layout from "@/components/Layout";

const Home = function () {

  const images = [
    "face1.jpeg",
    "face2.jpeg",
    "face3.jpeg",
    "face4.jpeg",
    "face5.jpeg",
    "face6.jpeg"
  ]

  return (
    <Layout>
      {/* Top row with title & add picture button */}
      <div className="flex flex-col gap-8">
        <div className="flex flex-row justify-between">
          <div className="flex flex-col">
            <p>
              Tired of the boring backgrounds on your selfies?
            </p>
            <p>
              Drag & drop a picture in here and get a cool new one!
            </p>
          </div>
          <div>
            <button className="bg-blue-600 text-white px-4 py-2 rounded">
              Upload picture
            </button>
          </div>
        </div>
        <div className="grid grid-cols-1 md:grid-cols-3 gap-4">
          {images.map((image, index) => (
            <div key={index} className="flex flex-col items-center">
              <img src={image} alt={"Random person" + index} className="rounded-lg" />
            </div>
          ))}
        </div>
      </div>
    </Layout>
  );
}

export default Home;
Our site is taking shape! We have all basic elements we wanted to set up before adding functionality.
Adding interaction
Lastly, let's make our upload button work. This is our current button, without any interaction.
<div>
	<button className="bg-blue-600 text-white px-4 py-2 rounded">
		Upload picture
	</button>
</div>
To add the possibility to upload a file when clicking this button, we'll replace it with an <input> field. An input is HTML's built in way to accept text or data. Normally it's part of a form, but we can also use it standalone. To react to file uploads, we'll need to use a React concept called event handlers.
Event handlers are simply functions which get called when events, like button clicks are observed. These handle clicks to our <input>, we'll use the built in React prop onChange. This gets called in case we've clicked the input and selected a file to upload. Here is our updated button:
<div>
	<label
		className="bg-blue-600 text-white px-4 py-2 rounded cursor-pointer">
		Upload picture
		<input
			type="file"
			className="hidden"
			accept="image/*"
			onChange={handleFileChange} />
	</label>
</div>
This change preserves our current style, but will throw an error, since the handleFileChange event handler does not yet exits. Let's create it.
Create a function called handleFileChange in the index.tsx file, but make sure to place it above and outside of the return ( ... section. The function needs to look like this:
const handleFileChange = (event: React.ChangeEvent<HTMLInputElement>) => {
	const file = event.target.files?.[0] || null;
	if (file)
		alert("File uploaded: " + file?.name);
};
The function has an argument called event, which is the built in React event called when a HTML input changes in some way. Since in our case this change represents a file upload, we can access the file by looking at the event's target. The event's target is the HTML field initiating the event, in our case, the input field. This field holds a list of files, since the input can accept multiple files at the same time. Try clicking the Upload picture button now. It'll prompt you to upload a file. Once you select one, it'll show an alert with the uploaded file's filename.

We're making progress! Now to the hard part: We need to make our data dynamic by building a simple back-end to communicate with a database. We'll make it possible to upload images to our back-end, save them into a Cloudflare R2 'bucket' and add the file info to our Postgres database hosted by Neon. This way our images will be accessible from anywhere.
Since this guide has ballooned larger than expected, so I'll stop here and break the build into multiple parts. Next up: Building the back-end:

If you like what I do, buy me a beer:


