Building a background swapper app with NextJS - Part III
It's time for our first integrations! Today we're connecting a Postgres DB from Neon and Cloudflare's R2 object storage for saving our pictures.
In the third article of this series, we'll continue developing our Next.js Background Swapper. If you haven't read the second article, I recommend checking it out:
If you'd like to dive in here, check out the git repository for the series:
Here, you can check out the repo & switch to the progress/article2_end branch if you'd like to catch up to our current starting point.
Connecting a database
At this point, the MVP versions of our front-end and back-end are ready. What we're missing is two things:
- A database to record which images we've uploaded
- A remote object storage service where we can save the image files.
Why not save the images on disk or in the database?
Storing the uploaded file in the DB is not recommended and we don't want it directly on the disk since this limits our application's future growth and might jeopardise the data. What we'll do instead is have our back-end upload the received file to a remote object storage service, in our case Cloudflare R2. This will keep the uploaded files safe, while allowing us to access them from anywhere. It also means that if we had to run multiple instances of our app, they'd all have access to the same files.
To continue, we'll need to register with two services: Cloudflare, for our R2 storage and Neon, for our database. Note that Cloudflare R2 requires a credit card, but I believe remote object storage for storing your files is essential for production scenarioes and necessary to understand.
Registering our Neon account & creating our database
Go to https://neon.tech/ and sign up for a free account. After registering and logging in, the platform will ask us to create a project. The values here are not important, but I recommend you choose the server closes to your location, so the database connection is performant. Since I'm located in Europe, I'll choose Frankfurt.
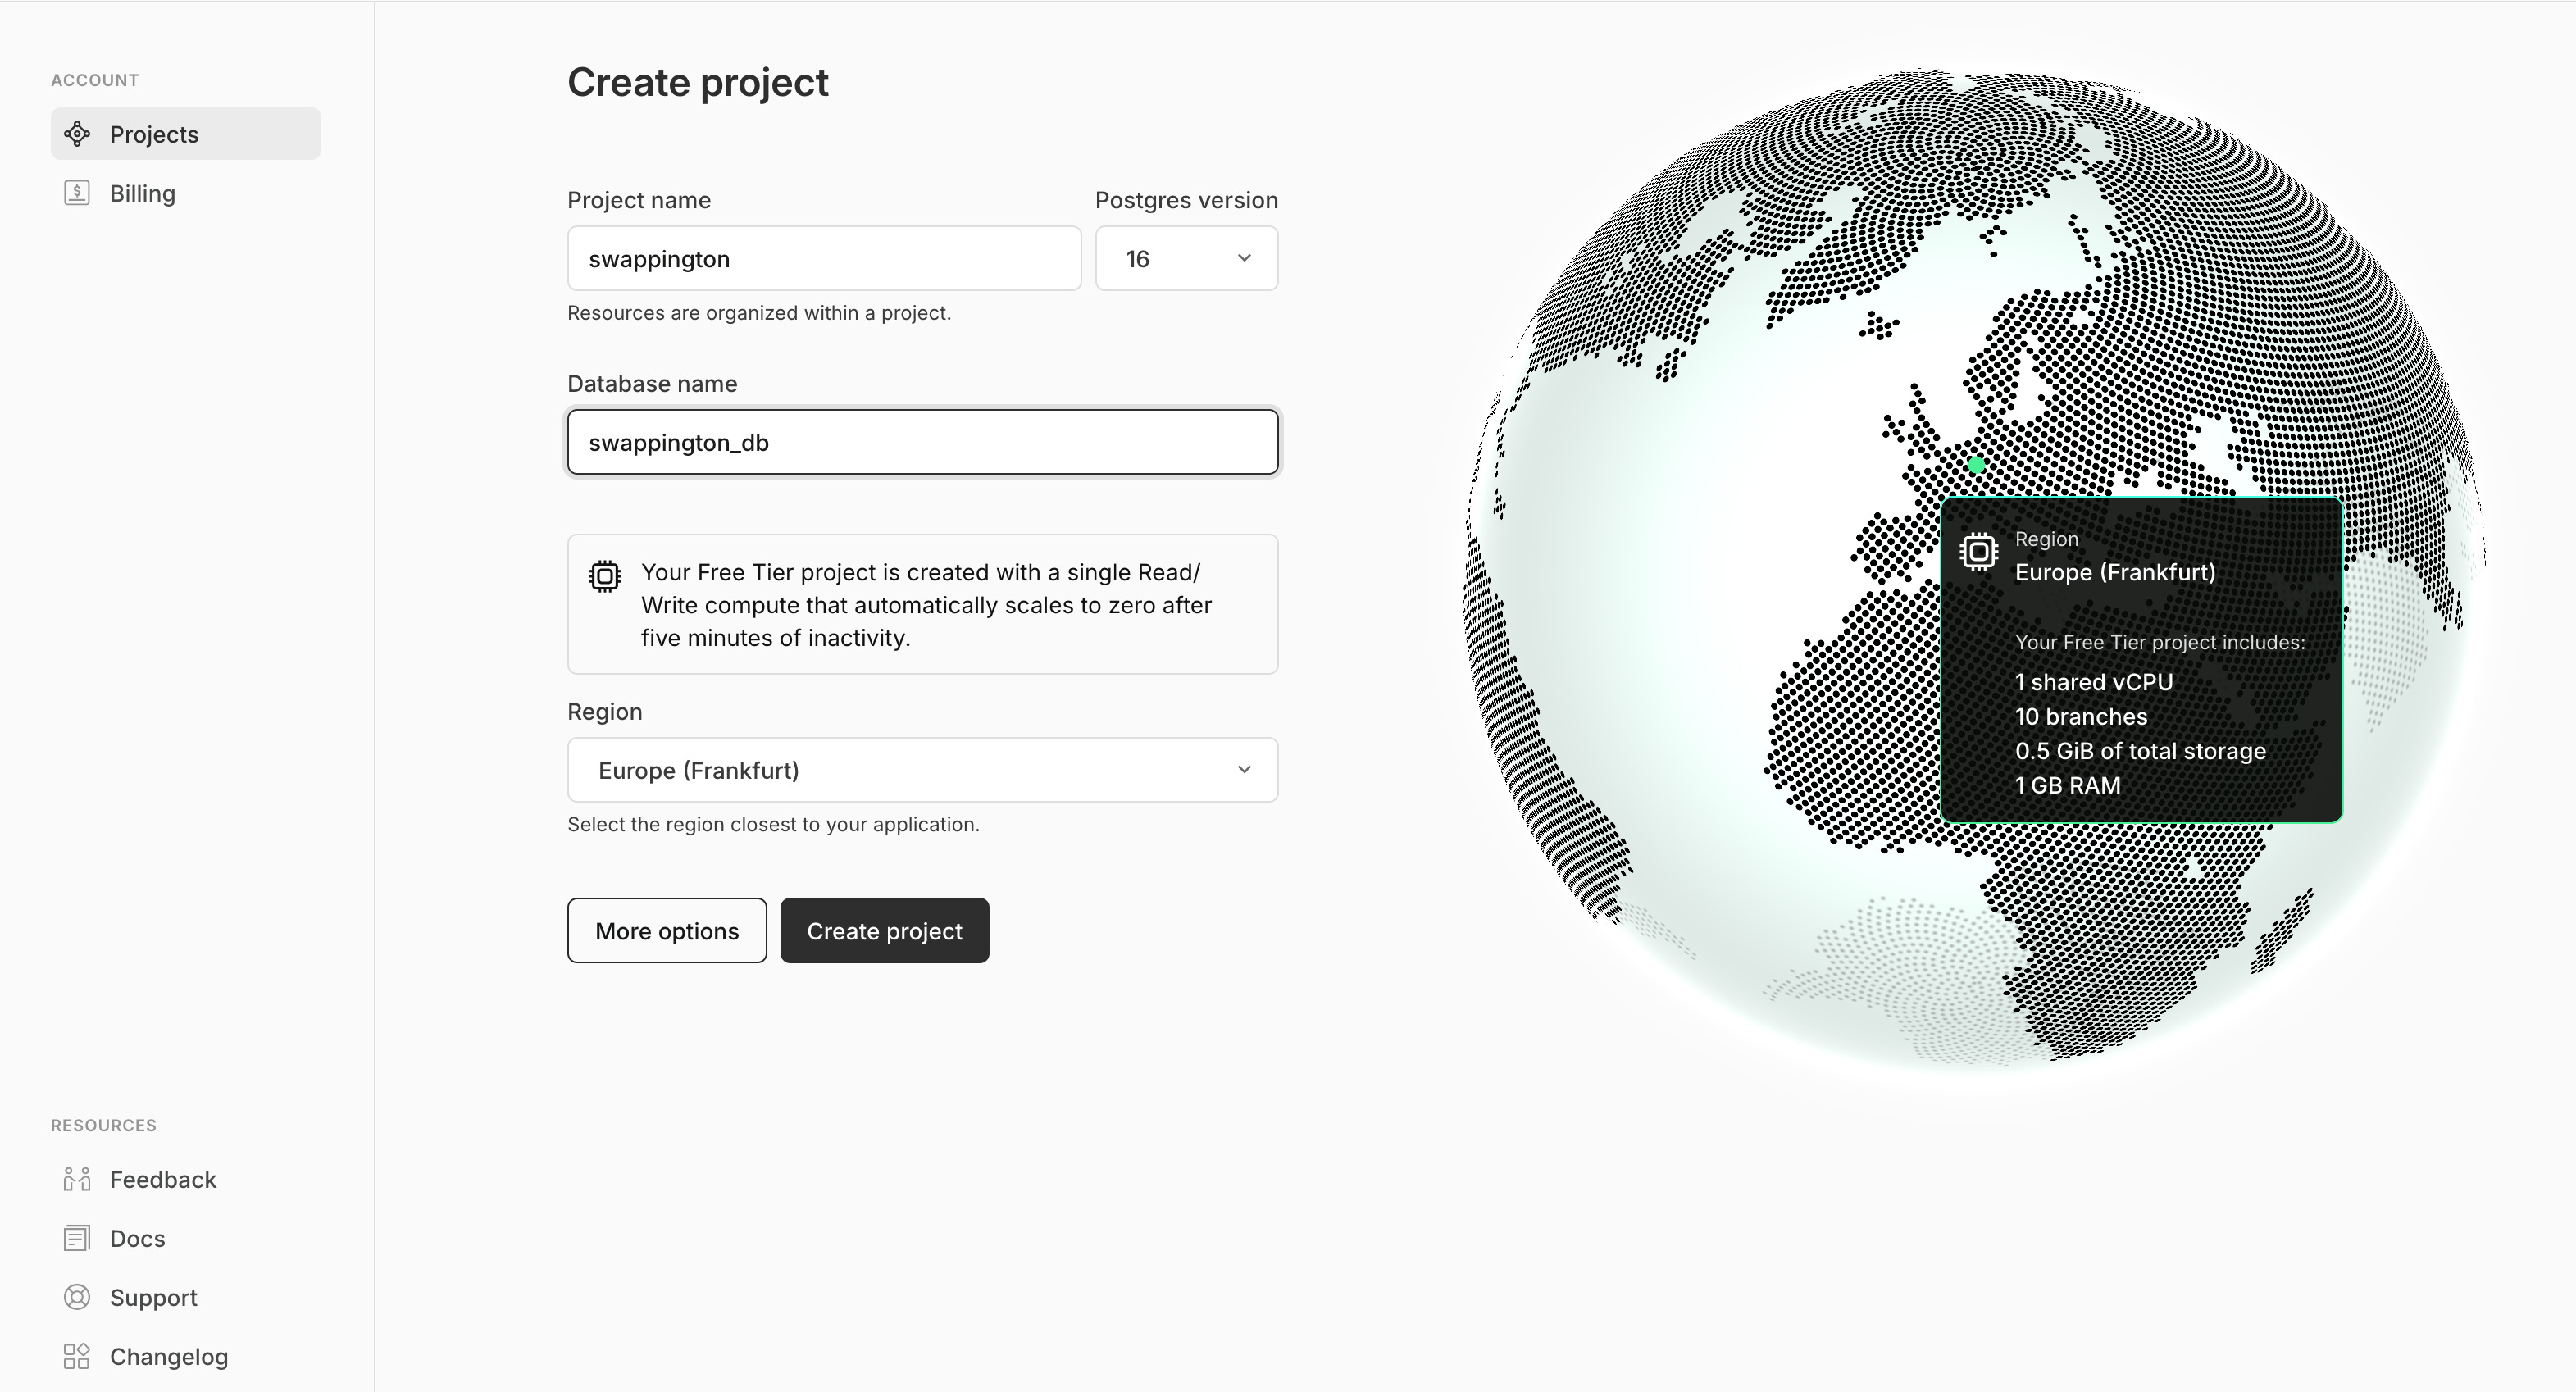
Once this is done, we'll be greeted with a project overview. Neon already created a database for us and we're ready to connect to it.
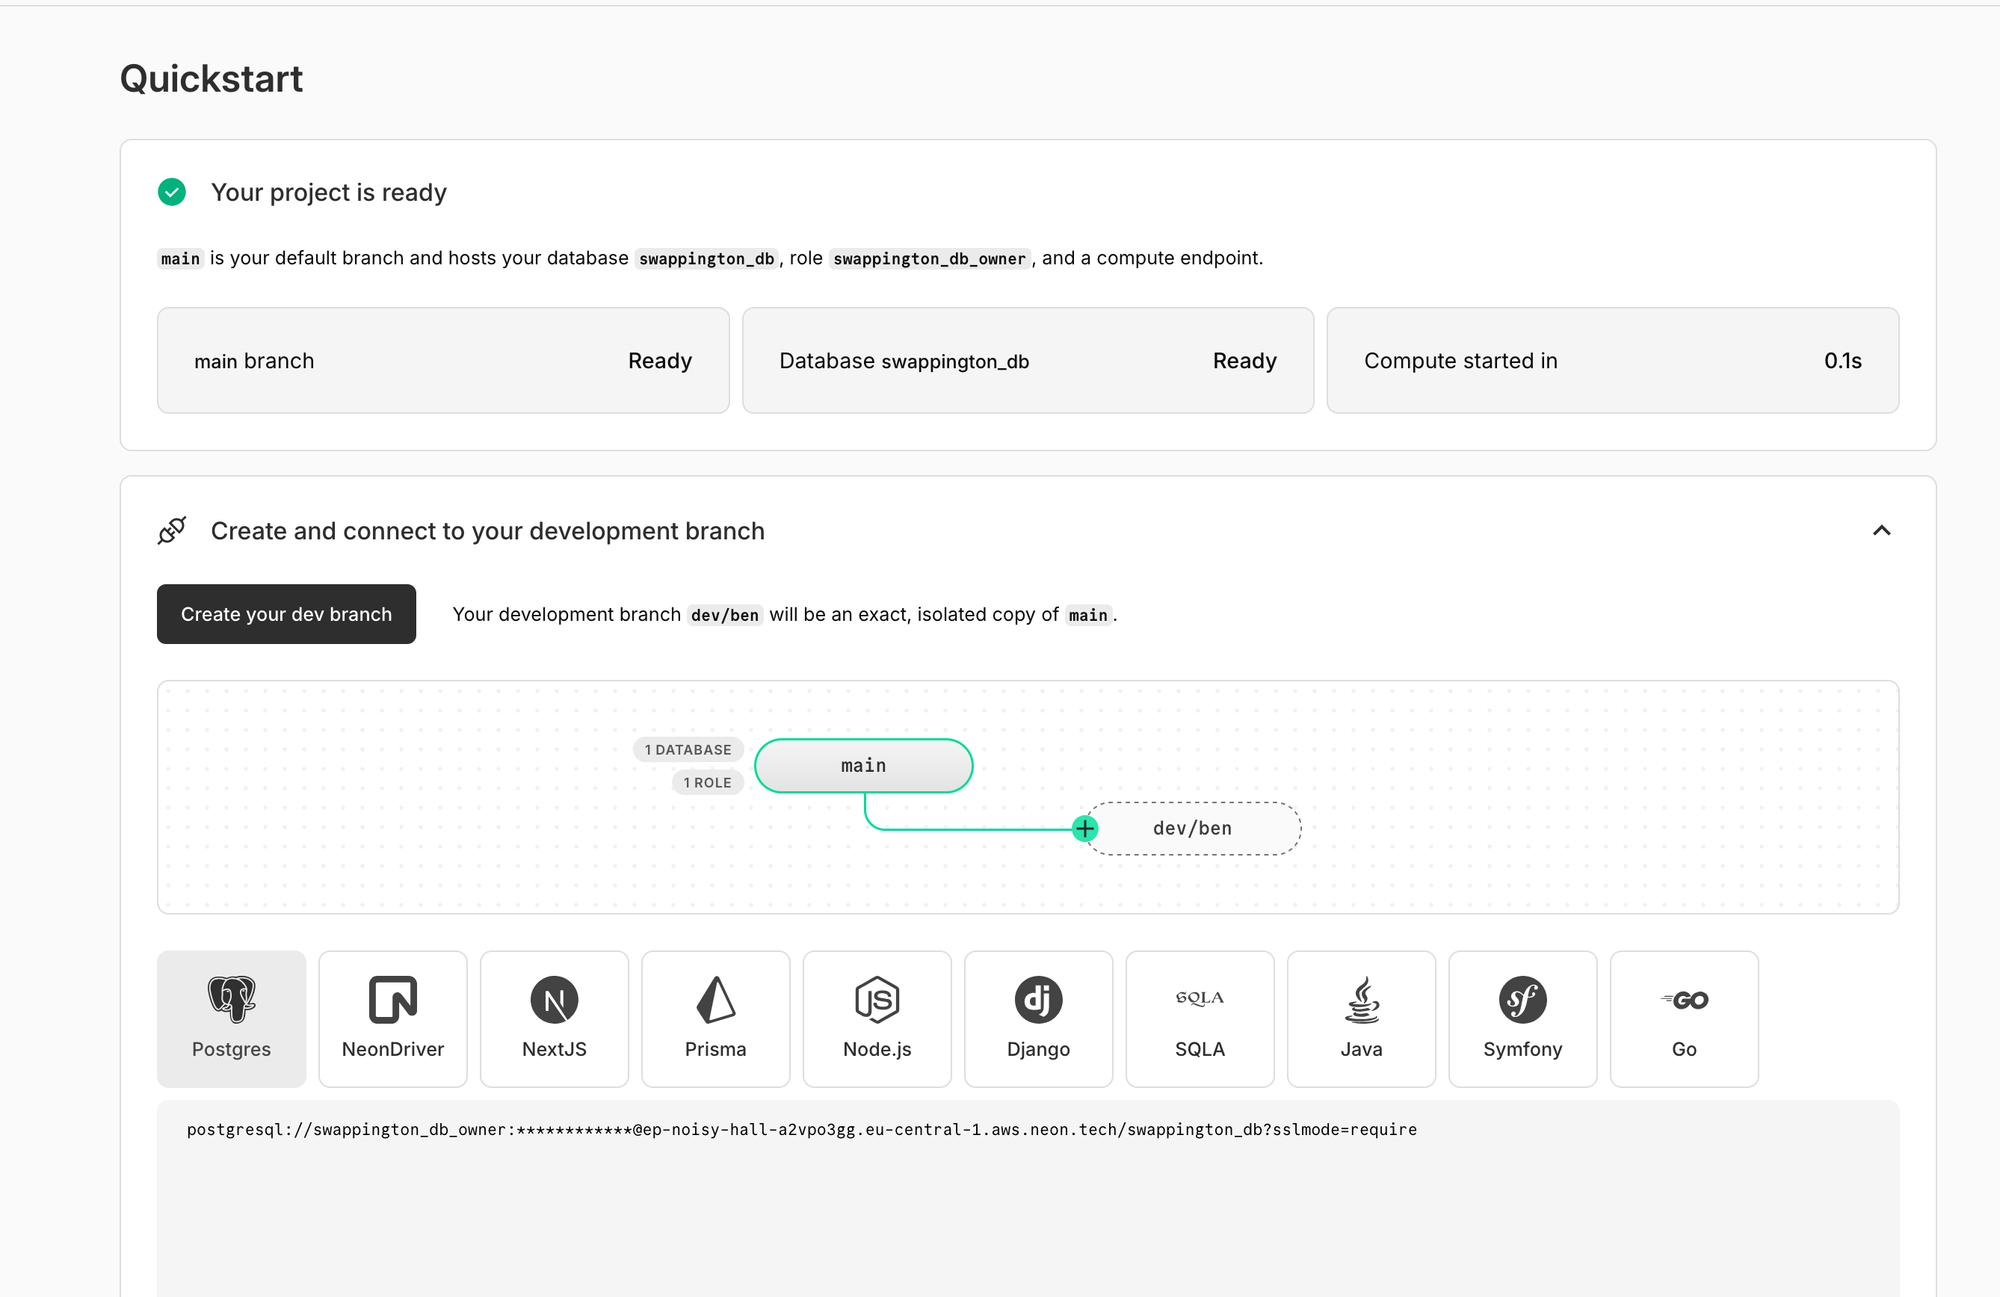
You can connect to a database using different tools or just a regular command line. However for our purposes, we'll be using an ORM, which is short for Object Relational Model. ORMs make database interactions simpler and more secure for applications, by creating objects out of database rows and limiting commands which can be run on the database. Since there are many ORMs out there, Neon provides multiple snippets out of the box to connect via a few of them.

There is a default NextJS option, but we'll use Prisma, since it is an industry standard NodeJS ORM. Prisma allows us to define a database schema using a schema.prisma file. Here we can define our PictureRecord model, which Prisma will turn into a database table once it connects to Neon.
Installing database dependency
For prisma, we'll need to install two dependencies. The @prisma/client dependency, which will be used by our app to access our ORM, and a devDependency to help create our schema and client functions during development.
yarn add @prisma/client && yarn add -D prisma
After these are installed, we can set up our configuration. Connecting to neon is done using a connection string, which we need to place inside the .env.local file. This file is used by NextJS to hold local configuration and is normally not part of your source code to avoid leaking configuration like this database config.
By copying the values we see on Neon's interface, let's create our .env.local and schema.prisma files. Create .env.local in the project root and copy the provided connection string into it.
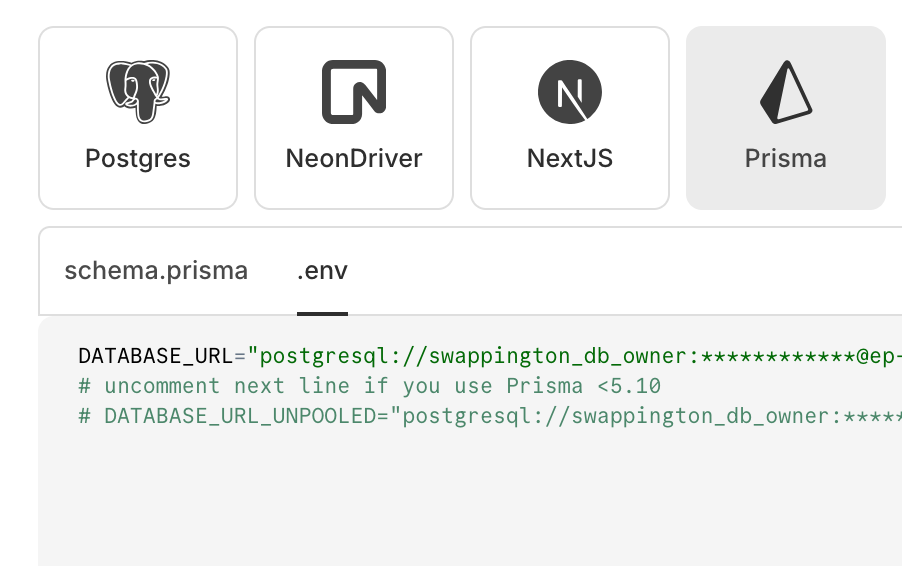
The file should look something like this after:
DATABASE_URL="postgresql://swappington_db_owner:asdb...
This will automatically be picked up by Prisma and used to connect to the database. Next is to copy the schema provided by Neon.
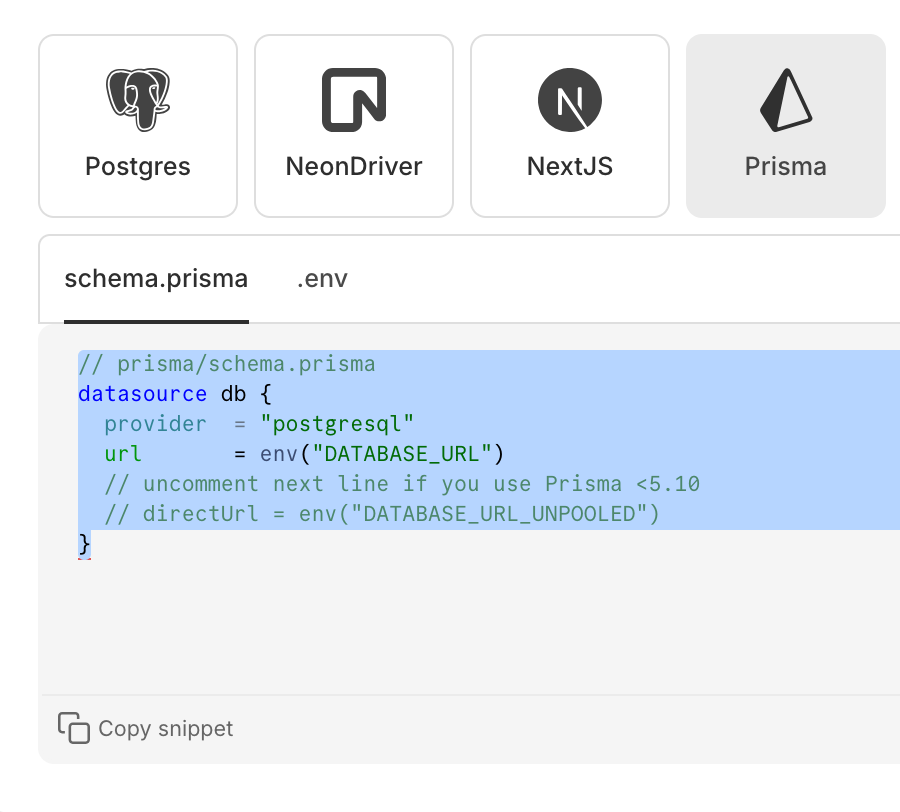
Configuring prisma
Prisma's configuration lives in a prisma folder, where we need to create a schema.prisma file. This will define our database connection, it's type and later, our models. You should have a file like this:
// prisma/schema.prisma
datasource db {
  provider  = "postgresql"
  url  	    = env("DATABASE_URL")
}

generator client {
  provider = "prisma-client-js"
}
The datasource section we copied from Neon, while the generator is needed for to be able to create database clients. We'll dive into this in a moment.
This is all we need to do the set up our database connection itself. However this is just the first step in storing our data. Now we need to configure our schema to include our model for PictureRecords, and we need to configure our application to run migrations for us.
Migrations are an SQL concept that signifies a change to database schema. You add a new table or field? You need to run a migration to update your existing database to match the new schema before you can continue using it. Prisma will generate migrations for us automatically based on our schema.prisma file. What we do need to do is manually run them before launching our application.
First, we'll add our schema. Since we've already created types for our PictureRecord, we can use this as a base for prisma's schema. Prisma has a different syntax to typescript, for which we can always consult their handy schema reference.
// prisma/schema.prisma
datasource db {
  provider  = "postgresql"
  url  	    = env("DATABASE_URL")
}

model PictureModel {
  id        Int      @id @default(autoincrement())
  name      String
  url       String
  created_at DateTime @default(now())
}
The models defined in our schema will become database tables, while their properties will be the columns or relations. PictureModel represents the same data that the PictureRecord type does, but it is defined in a format that prisma can use to generate a table. Naming it differently also avoids ambiguity.
Now that we've added our model to our schema, we need to modify our package.json file to run migrations whenever prisma detects a schema change. Change the scripts section of your package.json file to match this:
"scripts": {
    "dev": "dotenv -e .env.local -- prisma migrate dev && prisma generate && next dev",
    "build": "next build",
    "start": "prisma migrate deploy && next start",
    "lint": "next lint"
  },
These commands will run migrations before our server is launched, making sure our database will be ready to go. One dev dependency we need to add is dotenv-cli. This is needed for reading our .env.local file for the development migration to work. Remember, without .env.local, prisma doesn't know which database to connect to. Add the dependency like this:
yarn add -D dotenv-cli
Now when you run your server with yarn dev and you have an open migration, you'll be prompted for a comment. Here you can very briefly describe what's in the migration:
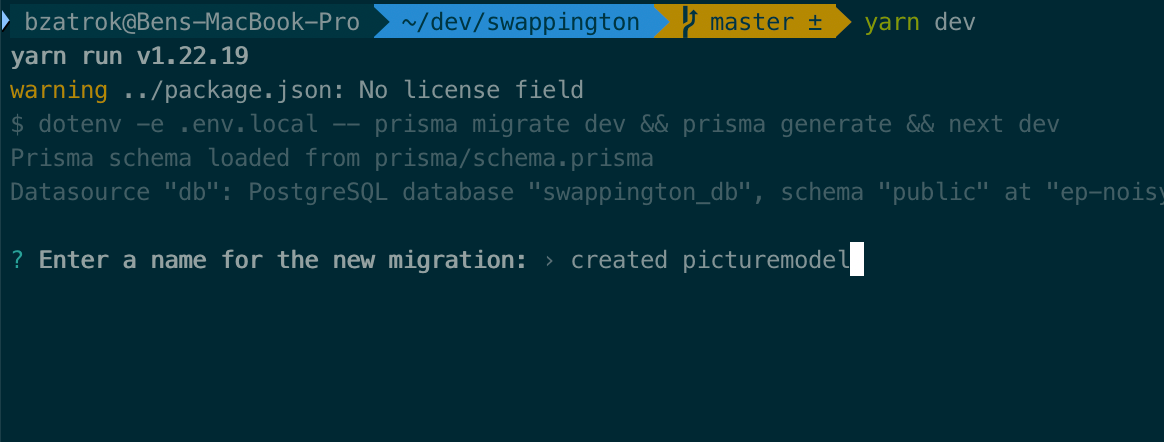
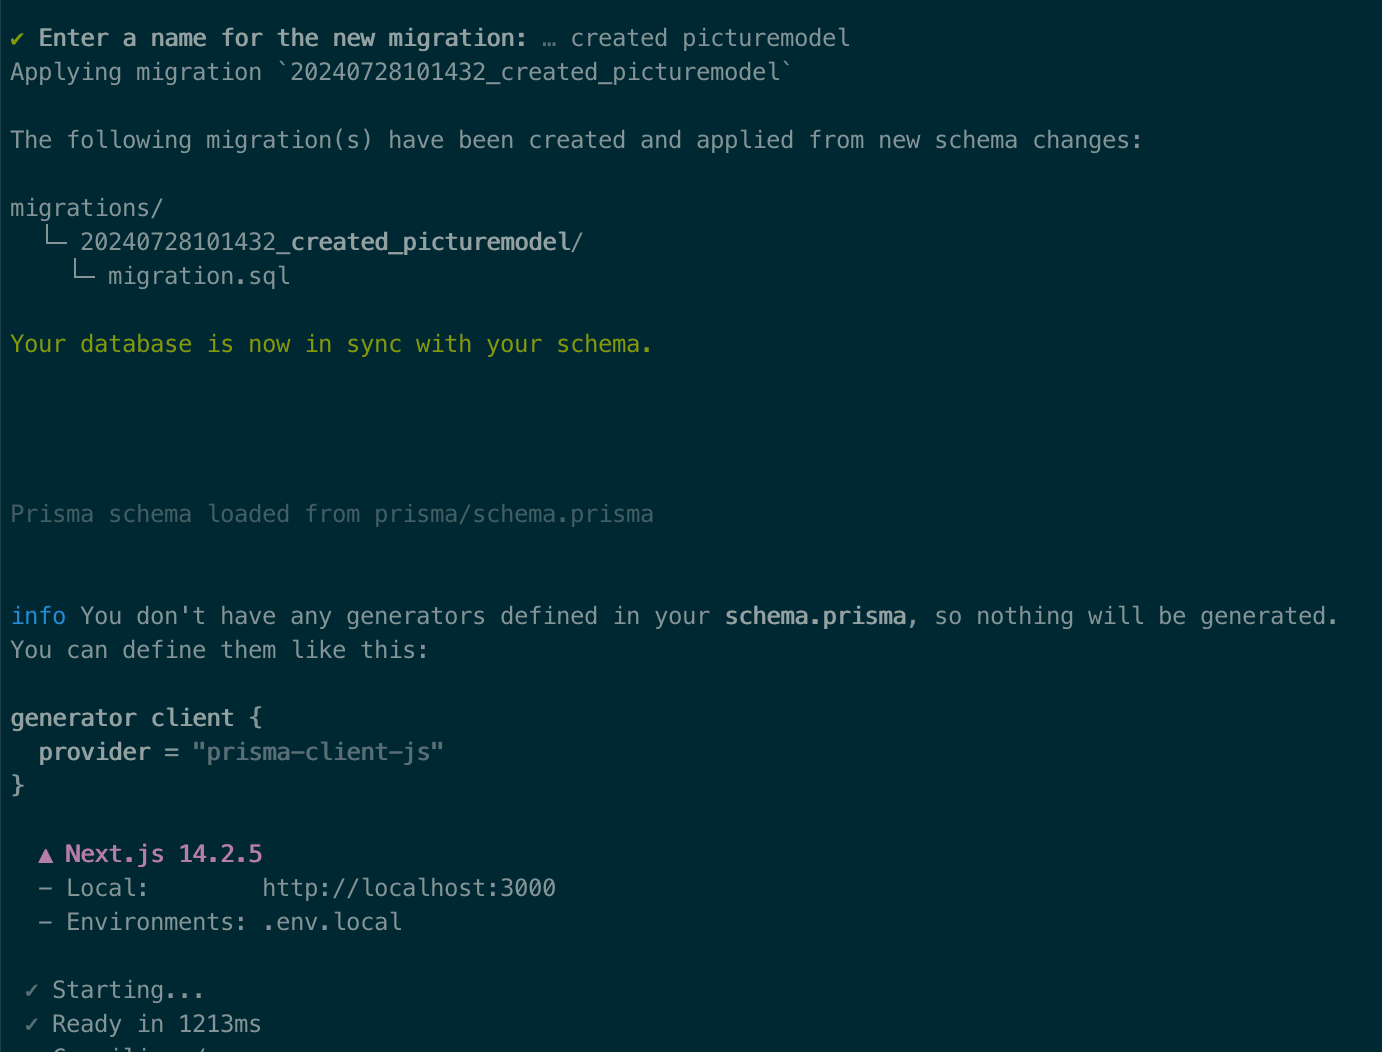
After entering your message, the migration process will run for a few seconds. Afterwards, our database is migrated and ready to go, along with our app:
Setting up our prisma client
Now we're ready to write code that interacts with our database! Prisma provides a base practice way to create a shared connection to the database, which can then be used throughout your app. My preferred way of writing database client code is store separate clients per table in a database folder. First, I like to define the shared connector called prismaClient, which will establish the connection. Here's my prismaClient.ts, based on Prisma's recommendations.
import {
    PrismaClient
} from '@prisma/client'

const prismaClientSingleton = () => {
    return new PrismaClient();
}

declare global {
    var prisma: ReturnType<typeof prismaClientSingleton>
}

export const initializePrisma = () => {
  globalThis.prisma = globalThis.prisma ?? prismaClientSingleton();
}
Here, the initializePrisma function creates a global prisma variable which we can import into other client classes and use for queries. Avoiding the creation of a new connection each time a database query needs to be run can make a huge performance difference once a lot of queries need to be processed.
The initializePrisma function needs to be called once for the connection to be created. Afterwards it will be held in a global variable for the duration our app is active. To call this function on startup, we need to setup a so-called instrumentation hook. This is a function that runs on the startup of our application and is handy for running checks & code necessary to run our side, before any user interaction occurs.
Initializing prisma on launch
To do this, we need to create an instrumentation.ts file in the root of our application and add a register() function to it. This function will run once our application starts. But, since we only want to run the initializePrisma function on our server, we need to add an if check for our NEXT_RUNTIME variable. For now we won't dive into this aspect of next, but note that database related logic can only run server side, while other code, such as front-end interactions and hooks can only run client side. Our instrumentation.ts file should look something like this:
import { initializePrisma } from "./database/prismaClient";

export async function register() {
    if (process.env['NEXT_RUNTIME'] === 'nodejs')
        initializePrisma();
}
Instrumentation won't run by default though, we need to enable it via next.config.js or next.config.mjs. In my case, the flag to add looks like this in next.config.mjs:
/** @type {import('next').NextConfig} */
const nextConfig = {
  reactStrictMode: false,
  experimental: {
    instrumentationHook: true
  }
};

export default nextConfig;
Once instrumentationHook is set to true, the register function will be execute with our prisma function.
Writing our database client for pictures
Now that we have access to prisma throughout our app, we can write our queries. To define our PictureModel related queries, let's create a new file named pictureModelClient.ts in the database folder. Here, we'll define two functions. One to get all pictures out of our database to feed out GET /api/pictures endpoint and another to create a new picture model from an upload to POST /api/picture.
The way to make adjustments to the PictureModel table's rows is by using our globally available prisma variable, which holds references to each model in our schema. This variable uses our prisma client, which is generated thanks to our package.json changes on each run. This is what the yarn prisma generate command does.
// pictureModelClient.ts

class PictureModelClient {
    public async getAllPictureModels() {
        return await prisma.pictureModel.findMany();
    }

    public async createPictureModel(name: string, url: string) {
        return await prisma.pictureModel.create({
            data: {
                name,
                url
            },
        });
    }
}

// Usage example
const pictureModelClient = new PictureModelClient();

export default pictureModelClient;
Replacing placeholder functions with database queries
Now that we have these functions, it's time to connect them to our API endpoints.
In our pages/api folder, we have picture.ts and pictures.ts from our previous articles. We'll be editing these to use getAllPictureModels() and createPictureModel(), respectively.
In picture.ts, we want to replace our images placeholder with a database query. Since database queries to prisma are also async calls, we need to make sure our handler is also async. Our code now boils down to a database query & sending the response:
// Next.js API route support: https://nextjs.org/docs/api-routes/introduction
import pictureModelClient from "@/database/pictureModelClient";
import type { NextApiRequest, NextApiResponse } from "next";

export default async function handler(
  req: NextApiRequest,
  res: NextApiResponse<PictureListResponse>,
) {
  const images = await pictureModelClient.getAllPictureModels();
  res.status(200).json({ pictures: images });
}
Prisma now does all the work for us gathering all images from our database & return them via our /api/pictures endpoint. Since we don't have any images in our database, our homepage will be empty again.
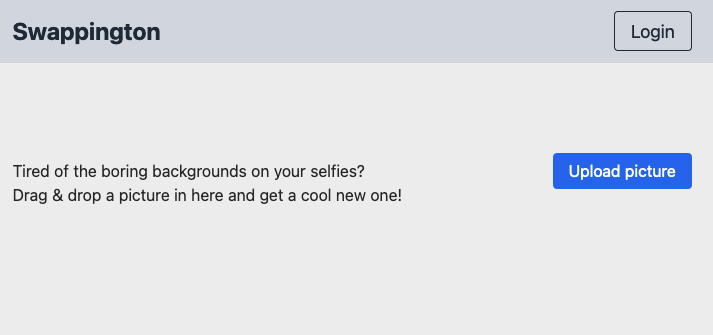
This is okay! We'll upload new images in no time!
Moving on to the creation endpoint, we need to do the same thing, but this time, using our createPictureModel function:
Previously, we've extracted the fileName and the uploaded file from our form POST. We're ready to save these to our database, but we've hit a roadblock. Our database expects a URL for a new picture. Where can we get this from?
const url = ???

const newPicture = await pictureModelClient.createPictureModel(fileName, url);
As discussed before, we do not want to store our picture on disk, nor do we want to store it in a database. To save a new picture, we want to save only it's url, but that means we need to now upload it to a remote object storage solution. Uploading a file here will give us a url we can use to access time image. Before we move on, we need to register for Cloudflare.
Registering for Cloudflare
Cloudflare provides a lot of services not just handy for for huge enterprises, but also for us wanting so self-host our own application. The service we're interested in is their R2 object storage service, which is compatible with the industry standard format of AWS's S3. Basically they provide an option to store files privately in the cloud for no up-front cost, which is ideal for us wanting to store our pictures.
Follow this link and click 'Get started' to register for Cloudflare. After registration, we're redirected to our dashboard. This has a lot of options, but we only care about R2 for now.
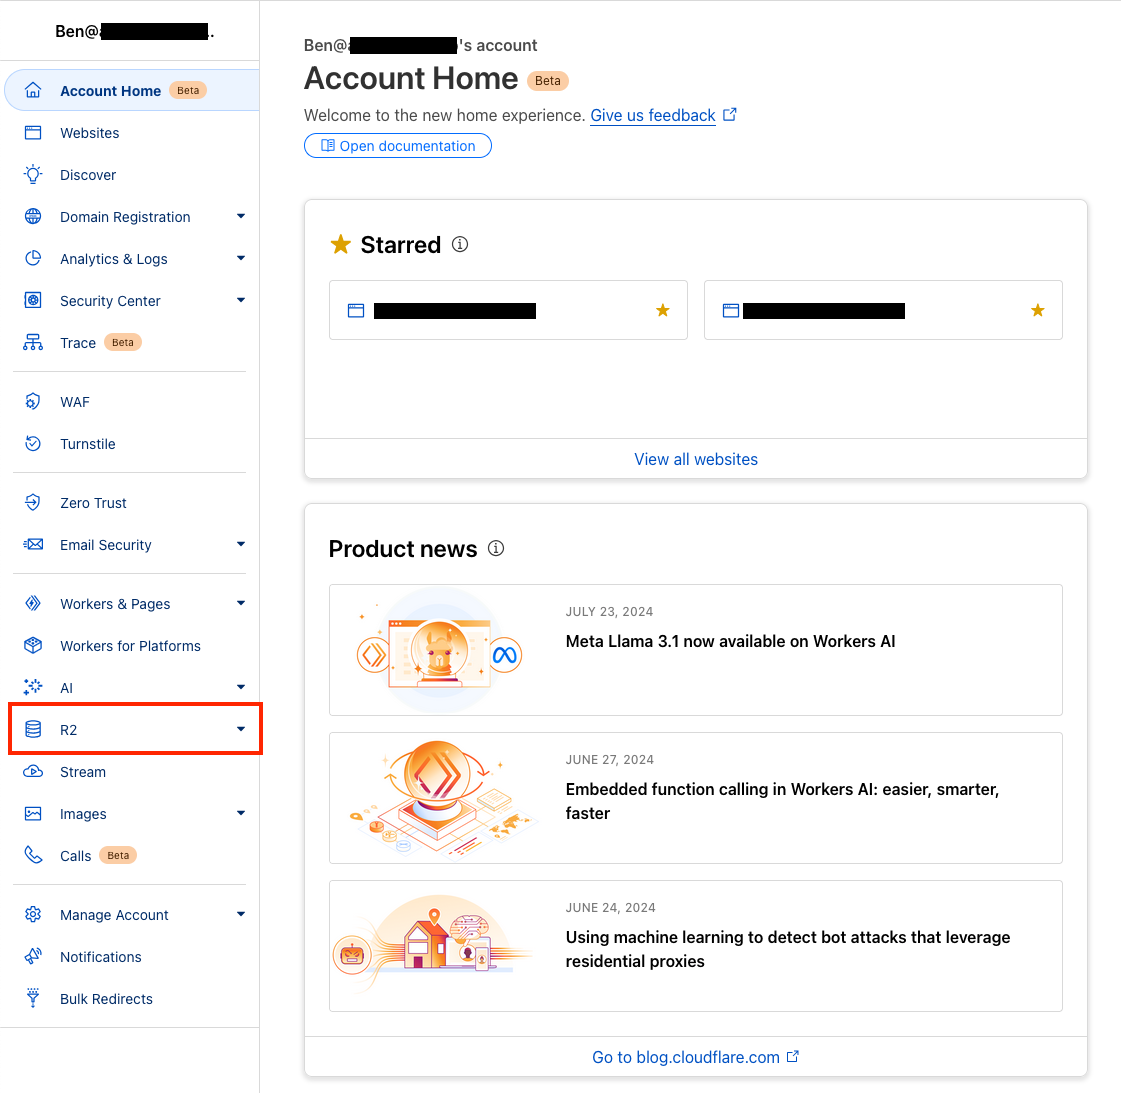
Enabling R2 requires a credit card, but I hope I can persuade you that unless you upload more than 10GB of data a month, you stay in the free tier. More info on this if you're concerned.
Once this is done, our R2 interface is simple: the only option we have is to create a bucket. This is an industry term meaning storage account. Think of it like a disk on your computer, with files and folders. Each bucket is separate from each other, meaning it's best to create a separate bucket for each project. For my use case, I'll use the default values and name by bucket swappington:
![[cloudflare_04.png]]
Once you click 'Create bucket' here, our remote object storage is ready.
![[cloudflare_05.png]]
Now we need to connect to it from our code. Since Cloudflare R2 is compatible with AWS's S3, we'll use AWS's original package to upload our file. This is a very well maintained and stable package, meaning we can focus on building our own solutions instead of building an integration to upload our files to remote storage. Kudos to Andi Ashari for the writeup on using Cloudflare R2 with AWS's S3 SDK.
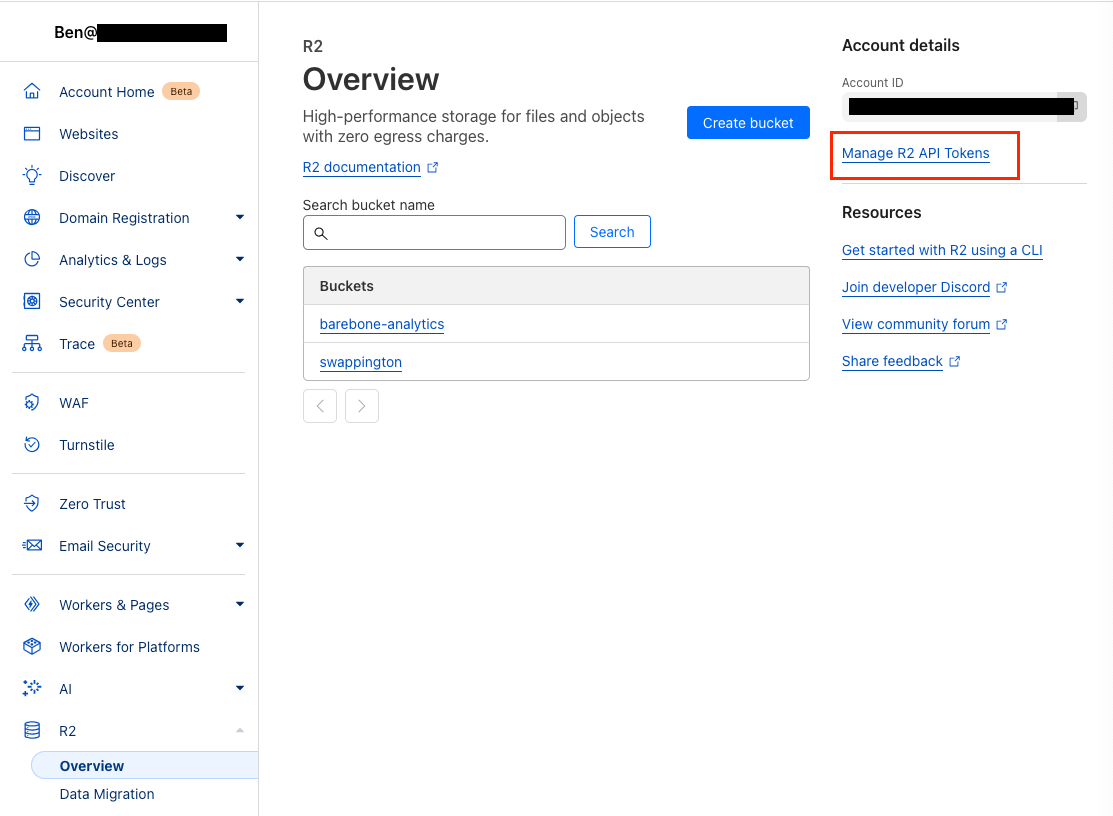
First, we need an api token from R2. This is so that our application can securely access our bucket. You can do this by clicking on 'Manager R2 API Tokens' in the R2 overview page:
Here, we want to create a token that lets us read & write objects. In my case, I prefer to limit what a token can do both in permissions (only read & write) and scope (only apply to my swappington bucket). It's a best practice to not create tokens that can do anything and access everything, mainly for security reasons.
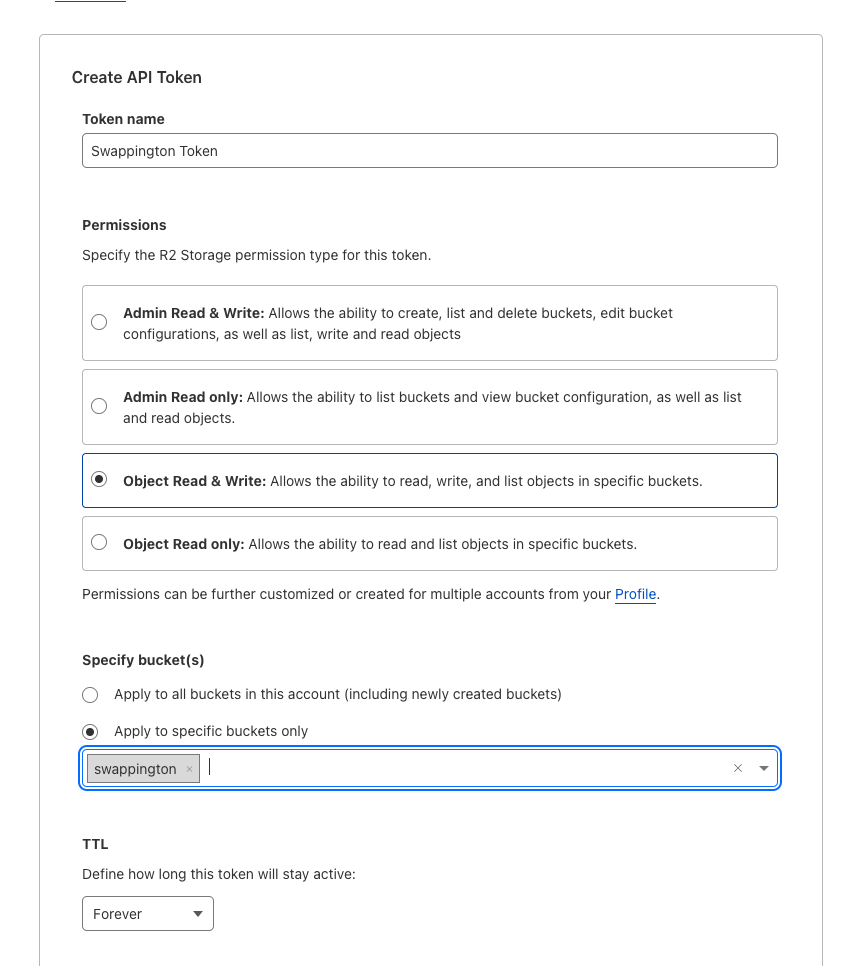
You can also limit which IP addresses can be used for your token for now, I'll grab my home ip from https://www.whatsmyip.org/ and set it here. After this is set, I'll click 'Create API Token'. We'll see a set of strings values here, which we can use to connect to our bucket. Keep this tab one as we'll use these values to configure our client within our application.
Creating the Cloudflare client
Next, in your terminal, run the following command to install the package AWS S3 node library to our NextJS project:
yarn add @aws-sdk/client-s3
Once this is installed, we can create a new folder storage in our project root, where we'll place a cloudflareClient.ts file. We'll define a helper function here that will upload our image to Cloudflare, using the AWS S3 SDK we just installed.
To make sure we have all the necessary credentials, we'll need to expand our .env.local file. We need to take the values from the API token generation page, namely:
- Access Key ID into
.env.localasCLOUDFLARE_ACCESS_KEY_ID - Secret Access Key into
.env.localasCLOUDFLARE_SECRET_ACCESS_KEY
From the R2 homepage, we need to grab our account ID show in the top right of the page.
- Account ID into
.env.localasCLOUDFLARE_ACCOUNT_ID
We also need the bucket name, in my caseswappington. - Bucket name into
.env.localasCLOUDFLARE_BUCKET_NAME.
Now we can access these values securely from cloudflareClient.ts.
import { getSignedUrl } from "@aws-sdk/s3-request-presigner";
import fs from 'fs/promises';

class CloudflareClient {
    private s3Client: S3Client;

    constructor() {
        const accessKeyId = process.env["CLOUDFLARE_ACCESS_KEY_ID"] || '';
        const secretAccessKey = process.env["CLOUDFLARE_SECRET_ACCESS_KEY"] || '';
        const accountId = process.env["CLOUDFLARE_ACCOUNT_ID"] || '';

        this.s3Client = new S3Client({
            endpoint: `https://${accountId}.r2.cloudflarestorage.com`,
            credentials: {
                accessKeyId: accessKeyId,
                secretAccessKey: secretAccessKey
            }
        });
    }
}

const cloudflareClient = new CloudflareClient();
export default cloudflareClient;
This file will create a class, which will read the .env.local variables we set to configure the S3 client pointing to Cloudflare. It will define one function, uploadPicture, which we can call from our POST /api/picture endpoint. We can pass our fileName and a reference to the upload image here and it'll do the rest.
However, the upload image will not be publicly accessible, thanks to our bucket keeping it secure. Problem is, we do want to see it on our homepage. For this, we need to have our code generate an authenticated url for our image, which can then be displayed by our front-end. For this, we need a dedicated package:
yarn add @aws-sdk/s3-request-presigner
Our flow will be the following. We take the uploaded image from POST /api/picture and pass it to the cloudflareClient.uploadPicture function. Here, we'll read the uploaded file and assemble an upload request from it. We'll execute the request and once it's finished, we'll check if the picture is available in our bucket. If yes, a secure 'signed' url will be generated for us.
public async uploadPicture(name: string, filePath: string) {
	const bucketName = process.env["CLOUDFLARE_BUCKET_NAME"] || '';
	const fileContent = await fs.readFile(filePath);

	const putObjectCommand = new PutObjectCommand({
		Bucket: bucketName,
		Key: name,
		Body: fileContent
	});

	await this.s3Client.send(putObjectCommand);

	const getObjectCommand = new GetObjectCommand({
		Bucket: bucketName,
		Key: name
	});

	const url = await getSignedUrl(this.s3Client, getObjectCommand, { expiresIn: 3600 });
	return url;
}
Note, that this is not a permanent solution to displaying the image, since the signed url has an expiration time. We will set up logic to generate signed urls for us when we fetch our pictures from the database in GET /api/pictures. An even better solution would be to create a CDN, which would allow us to point a custom domain to our bucket and remove the need for signed urls, however, we will not implement this for this project.
Here is the full cloudflareClient.ts file in it's final shape:
import { S3Client, PutObjectCommand, GetObjectCommand } from "@aws-sdk/client-s3";
import { getSignedUrl } from "@aws-sdk/s3-request-presigner";
import fs from 'fs/promises';

class CloudflareClient {
    private s3Client: S3Client;

    constructor() {
        const accessKeyId = process.env["CLOUDFLARE_ACCESS_KEY_ID"] || '';
        const secretAccessKey = process.env["CLOUDFLARE_SECRET_ACCESS_KEY"] || '';
        const accountId = process.env["CLOUDFLARE_ACCOUNT_ID"] || '';

        this.s3Client = new S3Client({
	        region: 'us-east-1', // ignored by cloudflare but needed for library
            endpoint: `https://${accountId}.r2.cloudflarestorage.com`,
            credentials: {
                accessKeyId: accessKeyId,
                secretAccessKey: secretAccessKey
            }
        });
    }

    public async uploadPicture(name: string, filePath: string) {
        const bucketName = process.env["CLOUDFLARE_BUCKET_NAME"] || '';
        const fileContent = await fs.readFile(filePath);

        const putObjectCommand = new PutObjectCommand({
            Bucket: bucketName,
            Key: name,
            Body: fileContent
        });

        await this.s3Client.send(putObjectCommand);

        const getObjectCommand = new GetObjectCommand({
            Bucket: bucketName,
            Key: name
        });

        const url = await getSignedUrl(this.s3Client, getObjectCommand, { expiresIn: 3600 });
        return url;
    }
}

const cloudflareClient = new CloudflareClient();
export default cloudflareClient;
Uploading the picture
Now onto using our newly created uploadPicture function. In our pages/api/picture.ts file, let's modify the end of our form.parse method to upload the picture to Cloudflare R2, then save it to our Neon database:
const url = await cloudflareClient.uploadPicture(fileName, file.filepath);
const urlExpiresAt = new Date(Date.now() + 3600 * 1000).toISOString();
const newPicture = await pictureModelClient.createPictureModel(fileName, url, urlExpiresAt);
res.status(200).json({ picture: newPicture });
Since our signed url has an expiration time of 3600 seconds, we also want to note the time at which our url will expire. We can then generate new urls for our images in GET /api/pictures, if necessary.
This gives us a bit of experience in handling migrations, since adding the urlExpirationTime property to our PictureModel will trigger a migration on next launch. Update your PictureModel in the prisma/schema.prisma to include the new field recording the expiration time of the signed URL.
model PictureModel {
  id           Int      @id @default(autoincrement())
  name         String
  url          String
  urlExpiresAt DateTime
  created_at   DateTime @default(now())
}
When prompted, enter a migration message next time the app is ran.
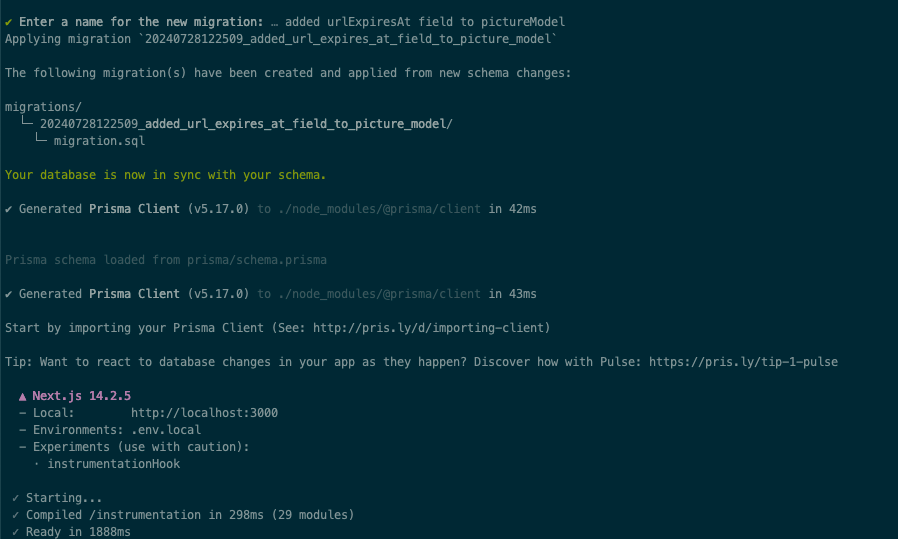
To use the field, we'll also need to update our PictureModelClient to account for the new field:
public async createPictureModel(name: string, url: string, urlExpiresAt: string) {
	return await prisma.pictureModel.create({
		data: {
			name,
			url,
			urlExpiresAt
		},
	});
}
We're ready for a test run. Our home page is now empty, so let's try and upload an image. I'll observe how Neon's table content and Cloudflare R2's bucket respond.
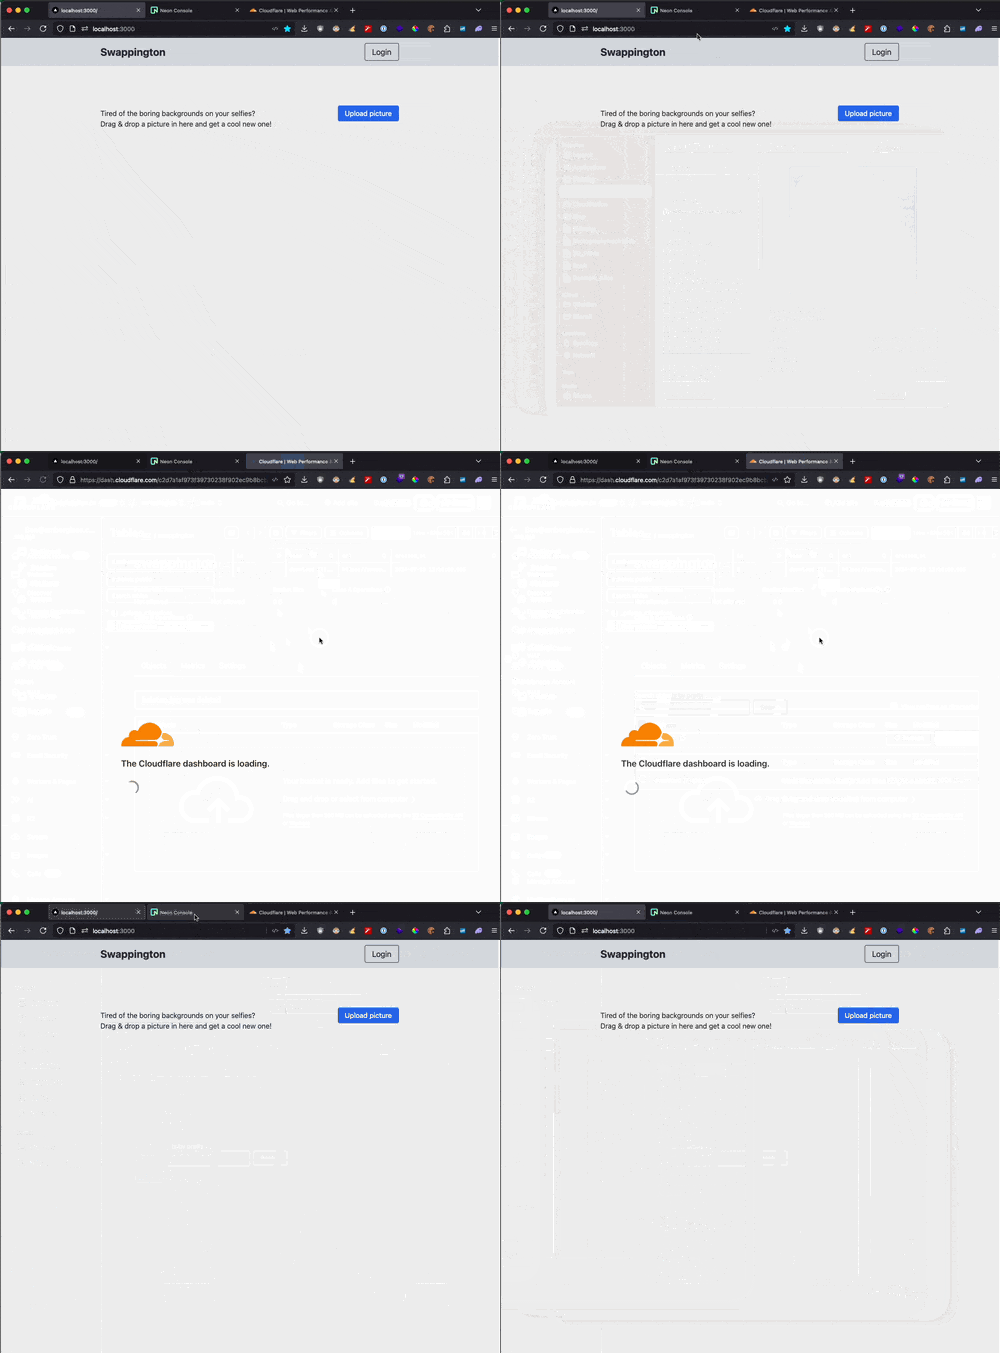
Success! We've uploaded our picture to Cloudflare & recorded it in our database. However our front-end didn't do anything. That's because we need to refresh it with the picture object from the POST /api/picture endpoint's response. In our index.tsx, let's handle the response in uploadImage(), by adding this line at the end of the function:
setImages([...images, data.picture]);
This will append our new picture to the end of the images already returned by GET /api/pictures. On the next page load, the new image will already be in the response from /api/pictures, since we saved it to the database.
Reloading our page: we see that our flow worked flawlessly:
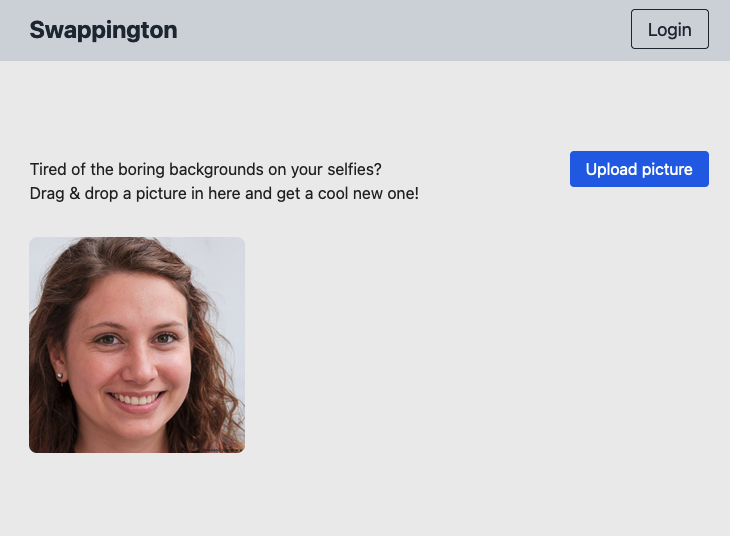
It doesn't look like much, but it's rewarding to see several integrations come together to render our front-end for us.
To round this off, let's adjust our GET /api/pictures endpoint. We don't want to be greeted with dead links when we come back to our project, so we should check if a new sign url needs to be generated, based on the urlExpiresAt field.
In pages/api/pictures we'll need to go through our images returned from our database and check if their expiration is happening soon. If yes, we should get a new signed url for them and save it into the database.
However, before we do that, I see a typescript error here, warning us that our PriceListResponse model is outdated.
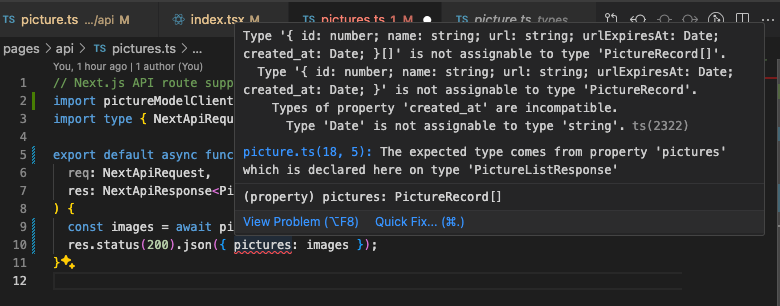
Since we added the urlExpiresAt field to our prisma schema, we also need to update our types in types/picture.ts. Add the urlExpiresAt field here as well:
type PictureRecord = {
    id: number;
    name: string;
    url: string;
    created_at: Date;
    urlExpiresAt: Date;
};
We also need to update create_at to be a type of 'Date', otherwise typescript will return further warnings.
Let's move on to creating a helper function that will update our urls. Since this is Cloudflare related, I want to create it inside cloudflareClient.ts. I've created a updateSignedUrlsIfNeeded function we can directly send a list of pictures to. The function will then check our pictures' urls are about the expire and where necessary, it'll run updates.
It will return the update picture urls, which we can then save to our database from our endpoint handler. The logic is to check if the picture's url will expire within 5 minutes or has already expired by comparing the urlExpiresAt date to the current time + 5minutes.
public async updateSignedUrlsIfNeeded(pictures: PictureRecord[]): Promise<PictureRecord[]> {
	const bucketName = process.env["CLOUDFLARE_BUCKET_NAME"] || '';
	const updatedPictures: PictureRecord[] = [];

	for (const picture of pictures) {
		const expirationTime = new Date(picture.urlExpiresAt);
		const currentTimePlus5Mins = new Date(Date.now() + 5 * 60 * 1000);

		if (expirationTime < currentTimePlus5Mins) {
			const url = await this.generateSignedUrl(bucketName, picture.name);
			const urlExpiresAt = new Date(Date.now() + 3600 * 1000);
			updatedPictures.push({ ...picture, url, urlExpiresAt });
		} else {
			updatedPictures.push(picture);
		}
	}

	return updatedPictures;
}
Since we use the signed URL generation in both this and the uploadPicture function, I've extract it into it's own self-contained function.
private async generateSignedUrl(bucketName: string, name: string) {
	const getObjectCommand = new GetObjectCommand({
		Bucket: bucketName,
		Key: name
	});

	const url = await getSignedUrl(this.s3Client, getObjectCommand, { expiresIn: 3600 });
	return url;
}
After implementing these functions, our pictures.ts file will look like this:
// Next.js API route support: https://nextjs.org/docs/api-routes/introduction
import pictureModelClient from "@/database/pictureModelClient";
import cloudflareClient from "@/storage/cloudflareClient";
import type { NextApiRequest, NextApiResponse } from "next";

export default async function handler(
  req: NextApiRequest,
  res: NextApiResponse<PictureListResponse>,
) {
	const images = await pictureModelClient.getAllPictureModels();
	const updatedImages = await cloudflareClient.updateSignedUrlsIfNeeded(images);
	res.status(200).json({ pictures: updatedImages });
}
Notice that after we've fetched the pictures from the database, they're forwarded to cloudflareClient for a signed url check. If any update is needed, it'll be returned here. At this point our update urls are not yet save to the database, so we need to add an extra function within pictureModelClient.ts to handle updates. This will loop through our images and update the url and urlExpiresAt fields.
public async updatePictureModels(pictures: PictureRecord[]) {
	const updatePromises = pictures.map(picture => {
		return prisma.pictureModel.update({
			where: { id: picture.id },
			data: {
				url: picture.url,
				urlExpiresAt: picture.urlExpiresAt
			}
		});
	});

	return await Promise.all(updatePromises);
}
We also need to call it from pictures.ts before the updated images are returned.
await pictureModelClient.updatePictureModels(updatedImages);
In the end our pages/api/pictures.ts file will look like this:
// Next.js API route support: https://nextjs.org/docs/api-routes/introduction
import pictureModelClient from "@/database/pictureModelClient";
import cloudflareClient from "@/storage/cloudflareClient";
import type { NextApiRequest, NextApiResponse } from "next";

export default async function handler(
  req: NextApiRequest,
  res: NextApiResponse<PictureListResponse>,
) {
	const images = await pictureModelClient.getAllPictureModels();
	const updatedImages = await cloudflareClient.updateSignedUrlsIfNeeded(images);
	await pictureModelClient.updatePictureModels(updatedImages);
	res.status(200).json({ pictures: updatedImages });
}
We do the processing logic here because this way our database client and Cloudflare client are not interacting with each other. Each is responsible for their own slick of the pie, namely interacting with the database and with the bucket.
This code has inefficiencies, namely we fetch new signed url when a request is made, possibly slowing down this api call. Second, we always update each picture's url and urlExpiresAt field, even if they don't need to be updated. I prefer to now prematurely refine an application, but keep in mind that these issues would have to be addressed to avoid performance penalties once this app starts getting used.
For now, pat yourself on the back, you've completed two separate integrations for your brand new app. I've uploaded a few extra images to test if things still go smoothly and all is well.

We're now ready for prime time: building the background swapping logic promised at the start of this series. See you next time!
If you like what I do, buy me a beer:


